SwiftLoggly
Simple way to logging with rich feature framework in Swift.
Features
- Support swift 5 and latest Xcode
- Method can helps to log String, NSDictionary, Dictionary, NSError, Error.
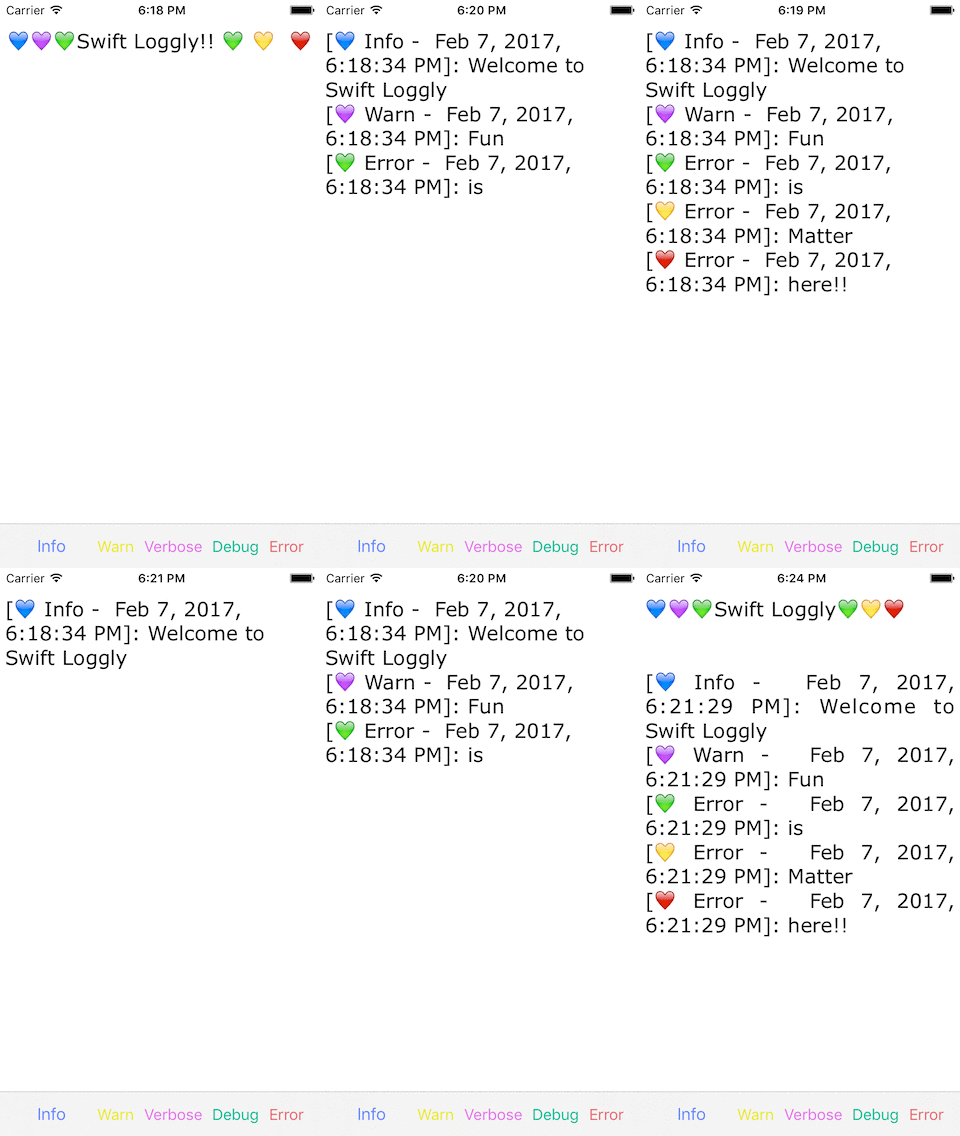
- Added the emojis for console log.
- Added the rich function for log tracking type.(Info, Verbose, Warnings, Debug, Error)
- Able to get logs count based on each type of log and export as CSV file.
- Coloured output log in Terminal for mac OS.
- Support CocoaPods, mac OS and Vapor framework(Swift Package Manager).
- Enabled logged format as Normal, JSON.
- Able to encoding log based on log Encoding Type(utf8, ascii, unicode, utf16, etc) Refer: String.Encoding.
Screenshots

iOS/MacOS import headers
First thing is to import the framework. See the Installation instructions on how to add the framework to your project.
//iOS - Objective-C
@import SwiftLoggly;

//iOS-Swift
import SwiftLoggly

//macOS
import SwiftLogglyOSX


// Enumaration for log format type
public enum LogFormatType {
    case Normal
    case JSON
}

// Enumaration for log type
public enum LogType {
    case Info
    case Verbose
    case Warnings
    case Debug
    case Error
}
Example
SwiftLoggly can be used right out of the box with no configuration, simply call the logging function.
Example 1 - Objective-C
// Log Dictionary
NSMutableDictionary *user1 = [NSMutableDictionary new];
[user1 setValue:@"vinoth" forKey:@"name" ];
[user1 setValue:@"[email protected]" forKey: @"email"];
[[Loggly logger] logglyWarningsWithDictionary:user1];

// Log string
NSString *jsonString  = @"[{\"name\":\"vignesh\",\"email\":\"[email protected]\"},{\"name\":\"vinoth\",\"email\":\"[email protected]\"}]";
[[Loggly logger] logglyInfoWithText:jsonString];
Example 2 - Swift
// String
loggly(LogType.Info, text: "Write to the log!")
logglyInfo(LogType.Info, text: "Write to the log!")

// NSDictionary
loggly(LogType.Verbose, dictionary: nsDictionary)
logglyVerbose(dictionary: nsDictionary)

// Dictionary
loggly(LogType.Warnings, dictionary: dictionary)
logglyWarnings(dictionary: nsDictionary)

// Just for fun!!
loggly(LogType.Info, text: "Welcome to Swift Loggly")
loggly(LogType.Verbose, text: "Fun")
loggly(LogType.Debug, text: "is")
loggly(LogType.Warnings, text: "Matter")
loggly(LogType.Error, text: "here!!")

// Normal Type

[💙 Info -  Jan 31, 2017, 1:52:38 PM]: Welcome to Swift Loggly
[💜 Warn -  Jan 31, 2017, 1:52:38 PM]: Fun
[💚 Error -  Jan 31, 2017, 1:52:38 PM]: is
[💛 Error -  Jan 31, 2017, 1:52:38 PM]: Matter
[❤️ Error -  Jan 31, 2017, 1:52:38 PM]: here!!

// JSON Type

{  "LogType" : "Info",  "LogDate" : "Mar 10, 2017, 2:53:15 PM",  "LogMessage" : "Welcome to Swift Loggly"}
{  "LogType" : "Verbose",  "LogDate" : "Mar 10, 2017, 2:53:15 PM",  "LogMessage" : "Fun"}
{  "LogType" : "Debug",  "LogDate" : "Mar 10, 2017, 2:53:15 PM",  "LogMessage" : "is"}
{  "LogType" : "Error",  "LogDate" : "Mar 10, 2017, 2:53:15 PM",  "LogMessage" : "here!!"}
{  "LogType" : "Info",  "LogDate" : "Mar 10, 2017, 2:53:15 PM",  "LogMessage" : "{  \"name\" : \"Vignesh\",  \"Position\" : \"Senior Engineer\"}"}
That will create a log file in the proper directory on both OS X/Ubuntu and iOS.
OS X/Ubuntu log files will be created in the log directory (found under: /Library/Logs). The iOS log files will be created in your apps document directory under a folder called Logs.
Configuration
There are a few configurable options in SwiftLoggly.
// Enable Emojis
Loggly.logger.enableEmojis = false

//Set the log save format type
Loggly.logger.logFormateType = LogFormateType.JSON  //default is "Normal"

// Set the log encoding format
Loggly.logger.logEncodingType = String.Encoding.utf8;  //default is "utf8"

//Set the name of the log files
Loggly.logger.name = "Sample" //default is "logglyfile"

//Set the max size of each log file. Value is in KB
Loggly.logger.maxFileSize = 2048 //default is 1024

//Set the max number of logs files that will be kept
Loggly.logger.maxFileCount = 8 //default is 4

//Set the directory in which the logs files will be written
Loggly.logger.directory = "/Library/XXX-folder-name-XXX" //default is the standard logging directory for each platform.

//This writes to the log
logglyInfo("Write to the log!")
Sample Projects
Sample Projects available under the /Examples folder.
Installation
CocoaPods
Check out Get Started tab on cocoapods.org.
To use SwiftLoggly in your project add the following 'Podfile' to your project
source 'https://github.com/CocoaPods/Specs.git'
platform :ios, '8.0'
use_frameworks!

pod 'SwiftLoggly'
Then run:
pod install || pod update
Swift Package Manager for Vapor
You need to add to dependencies in your 'Package.swift' and fetch Swift module using terminal comment.
// Vapor
dependencies: [
        .Package(url: "https://github.com/vigneshuvi/SwiftLoggly.git", majorVersion: 1, minor: 0)
        ],

Then run:

    vapor build || vapor xcode

// Importing header
import SwiftLoggly
License
SwiftLoggly is licensed under the MIT License.
Contact
Vignesh Kumar
GitHub
| link |
| Stars: 34 |
| Last commit: 2 years ago |
Release Notes
- Swift 5 and latest Xcode support
Swiftpack is being maintained by Petr Pavlik | @ptrpavlik | @swiftpackco | API | Analytics

