GistPublishPlugin
A Publish plugin which permits to embed Gist in your posts.
Why ? 👉 It's possible to copy/paste the gist code directly in your Publish website in one of your post / page but if you want to centralize your snippet / examples of code in Gist or mention a gist from someone else without have to copy it, it could help. When building again your Publish website (when adding a new post for example), the embedded gists will also be refreshed automatically with potential updates of code. It's also possible to embed the gist thanks to a <script> HTML entity but it's less flexible for rendering, theming etc.
📦 Installation
To install the plugin, add it as dependency in your Package.swift file:
let package = Package(
    ...
    dependencies: [
        ...
        .package(url: "https://github.com/thomaslupo/GistPublishPlugin", from: "0.2.0")
    ],
    targets: [
        .target(
            ...
            dependencies: [
                ...
                "GistPublishPlugin"
            ]
        )
    ]
    ...
)
Next, add the plugin at the publish step (in your main.swift file by default):
import GistPublishPlugin
...
try GistPublishPluginTests().publish(withTheme: .foundation, plugins: [.gist()])
🚀 Usage
To embed a gist in one of your post (or page etc.), use a blockquote in markdown, but add the "gist" prefix, like so:
> gist 05f837a3f901630e65e3652945424ba5
The suffix corresponds to the gist's unique identifier, available on the URL of the gist (https://gist.github.com/JohnSundell/05f837a3f901630e65e3652945424ba5)
By default, the gist will be added without any style. Let's add some style !
💎 Style
The plugin uses a default and basic gist renderer (embed the code in the <pre><code></code></pre> HTML entities) to be as flexible as possible with the syntax highlight, CSS attributes, colors etc.
It's possible to provide a custom renderer and use the EmbeddedGist entity and its properties to render the gist as you like.
For this example, let's use the Splash package to create a custom renderer.
Add it as dependency in your Package.swift file:
let package = Package(
    ...
    dependencies: [
        ...
        .package(url: "https://github.com/JohnSundell/Splash", from: "0.16.0")
    ],
    targets: [
        .target(
            ...
            dependencies: [
                ...
                "Splash"
            ]
        )
    ]
    ...
)
Create a custom renderer which uses Splash:
import Splash

class MyGistRenderer: GistRenderer {
    func render(gist: EmbeddedGist) throws -> String {
        let highlighter = SyntaxHighlighter(format: HTMLOutputFormat())
        return gist.files.map { file in
            return "<pre><code>" + highlighter.highlight(file.content) + "</pre></code>"
        }.joined(separator: "")
    }
}
Specify this custom renderer when declaring the GistPublishPlugin:
try GistPublishPluginTests().publish(withTheme: .foundation,
                                     plugins: [.gist(renderer: MyGistRenderer())])
Cool ! Let's reload the post's web page and ... uh, still ugly ?
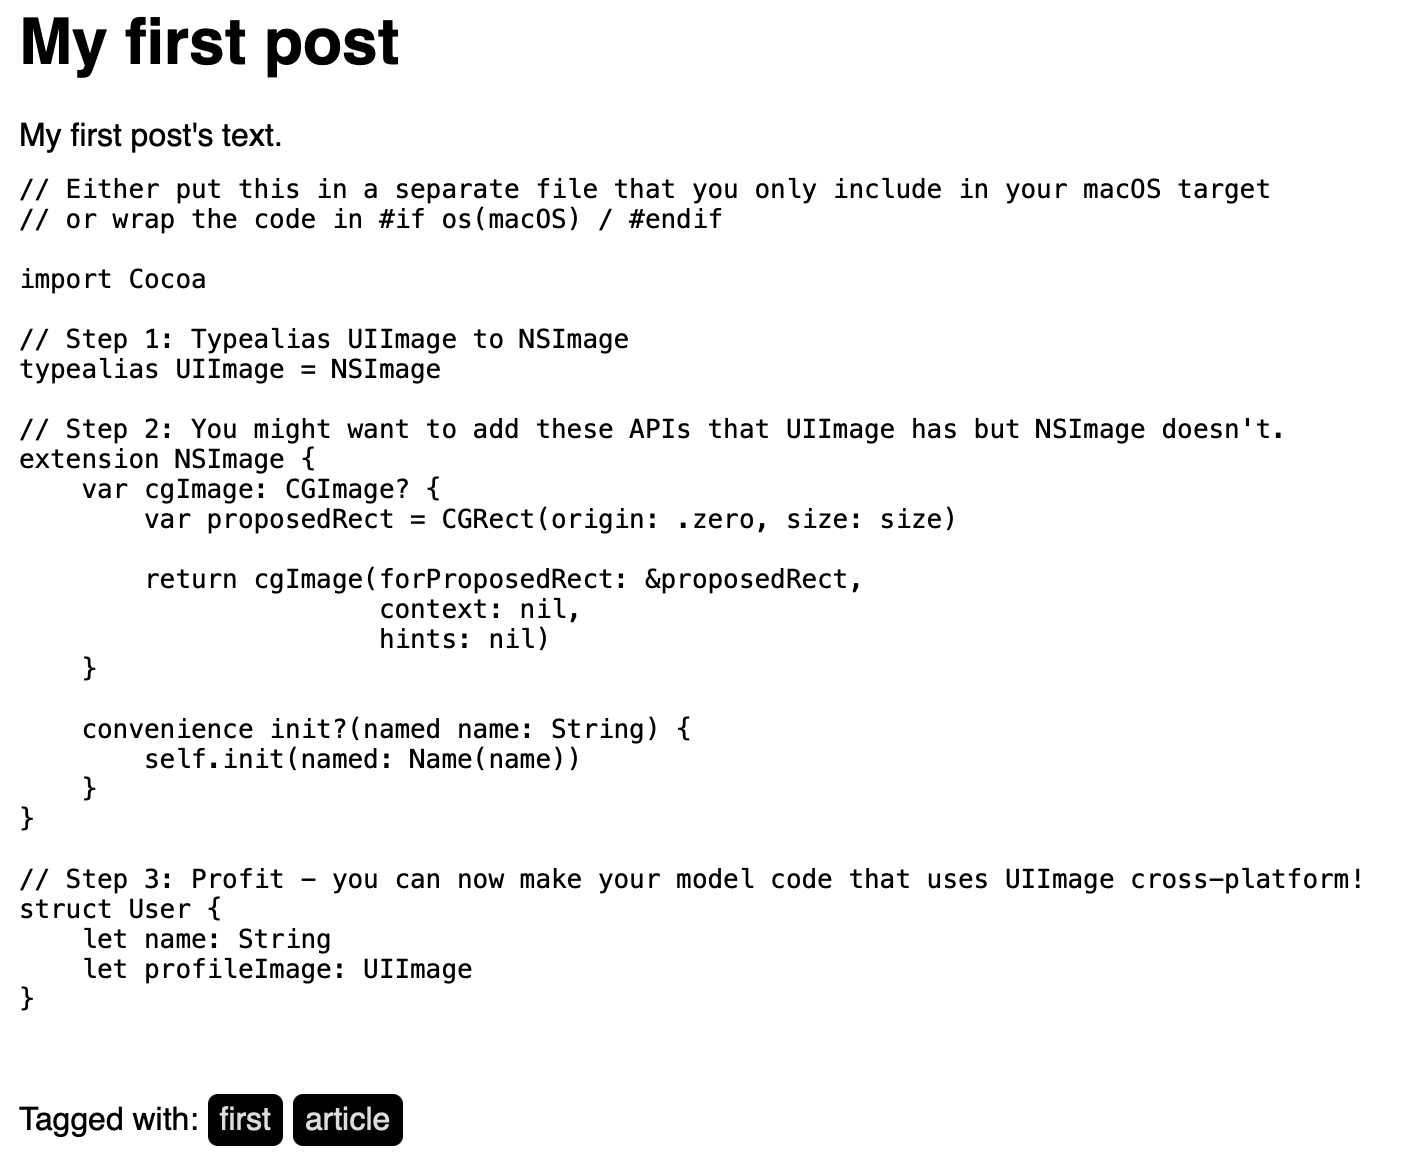
Yes, the Splash plugin has added all the correct HTML entities and CSS classes (like <span class="keyword">import</span>).
The final step is to add an associated CSS style. We're going to use this one, provided by John Sundell on the Splash documentation: https://github.com/JohnSundell/Splash/blob/master/Examples/sundellsColors.css.
To do this, I usually create a custom Theme for my Publish website.
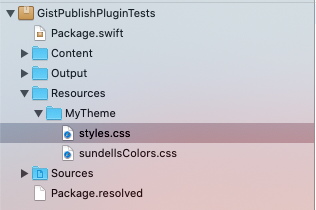
In the Resources directory of your Publish project, we can create a subfolder MyTheme, add it a copy of the default Publish CSS Style available in the Publish package (Publish/Resources/FoundationTheme/styles.css) and the sundellsColors.css file.
For the Theme, we can create a copy of the Theme+Foundation (Publish/Sources/Publish/API/Theme+Foundation.swift) in a Theme+MyTheme.swift file, just import Publish and add these naming updates:
import Publish
import Plot

public extension Theme {
    /// The default "Foundation" theme that Publish ships with, a very
    /// basic theme mostly implemented for demonstration purposes.
    static var myTheme: Self {
        Theme(
            htmlFactory: MyThemeHTMLFactory(),
            resourcePaths: [
                "Resources/MyTheme/styles.css",
                "Resources/MyTheme/sundellsColors.css"
            ]
        )
    }
}

private struct MyThemeHTMLFactory<Site: Website>: HTMLFactory {
  ...
}
We have to include our sundellsColors.css file on the HTML pages including some gist. Let's update the head in the makeItemHTML function:
func makeItemHTML(for item: Item<Site>,
                      context: PublishingContext<Site>) throws -> HTML {
        HTML(
            ...
            .head(for: item,
                  on: context.site,
                  stylesheetPaths: ["/styles.css", "/sundellsColors.css"]),
            ...
        )
    }
The last thing to do is to specify our new amazing theme when publishing our website:
try GistPublishPluginTests().publish(withTheme: .myTheme,
                                     plugins: [.gist(renderer: MyGistRenderer())])
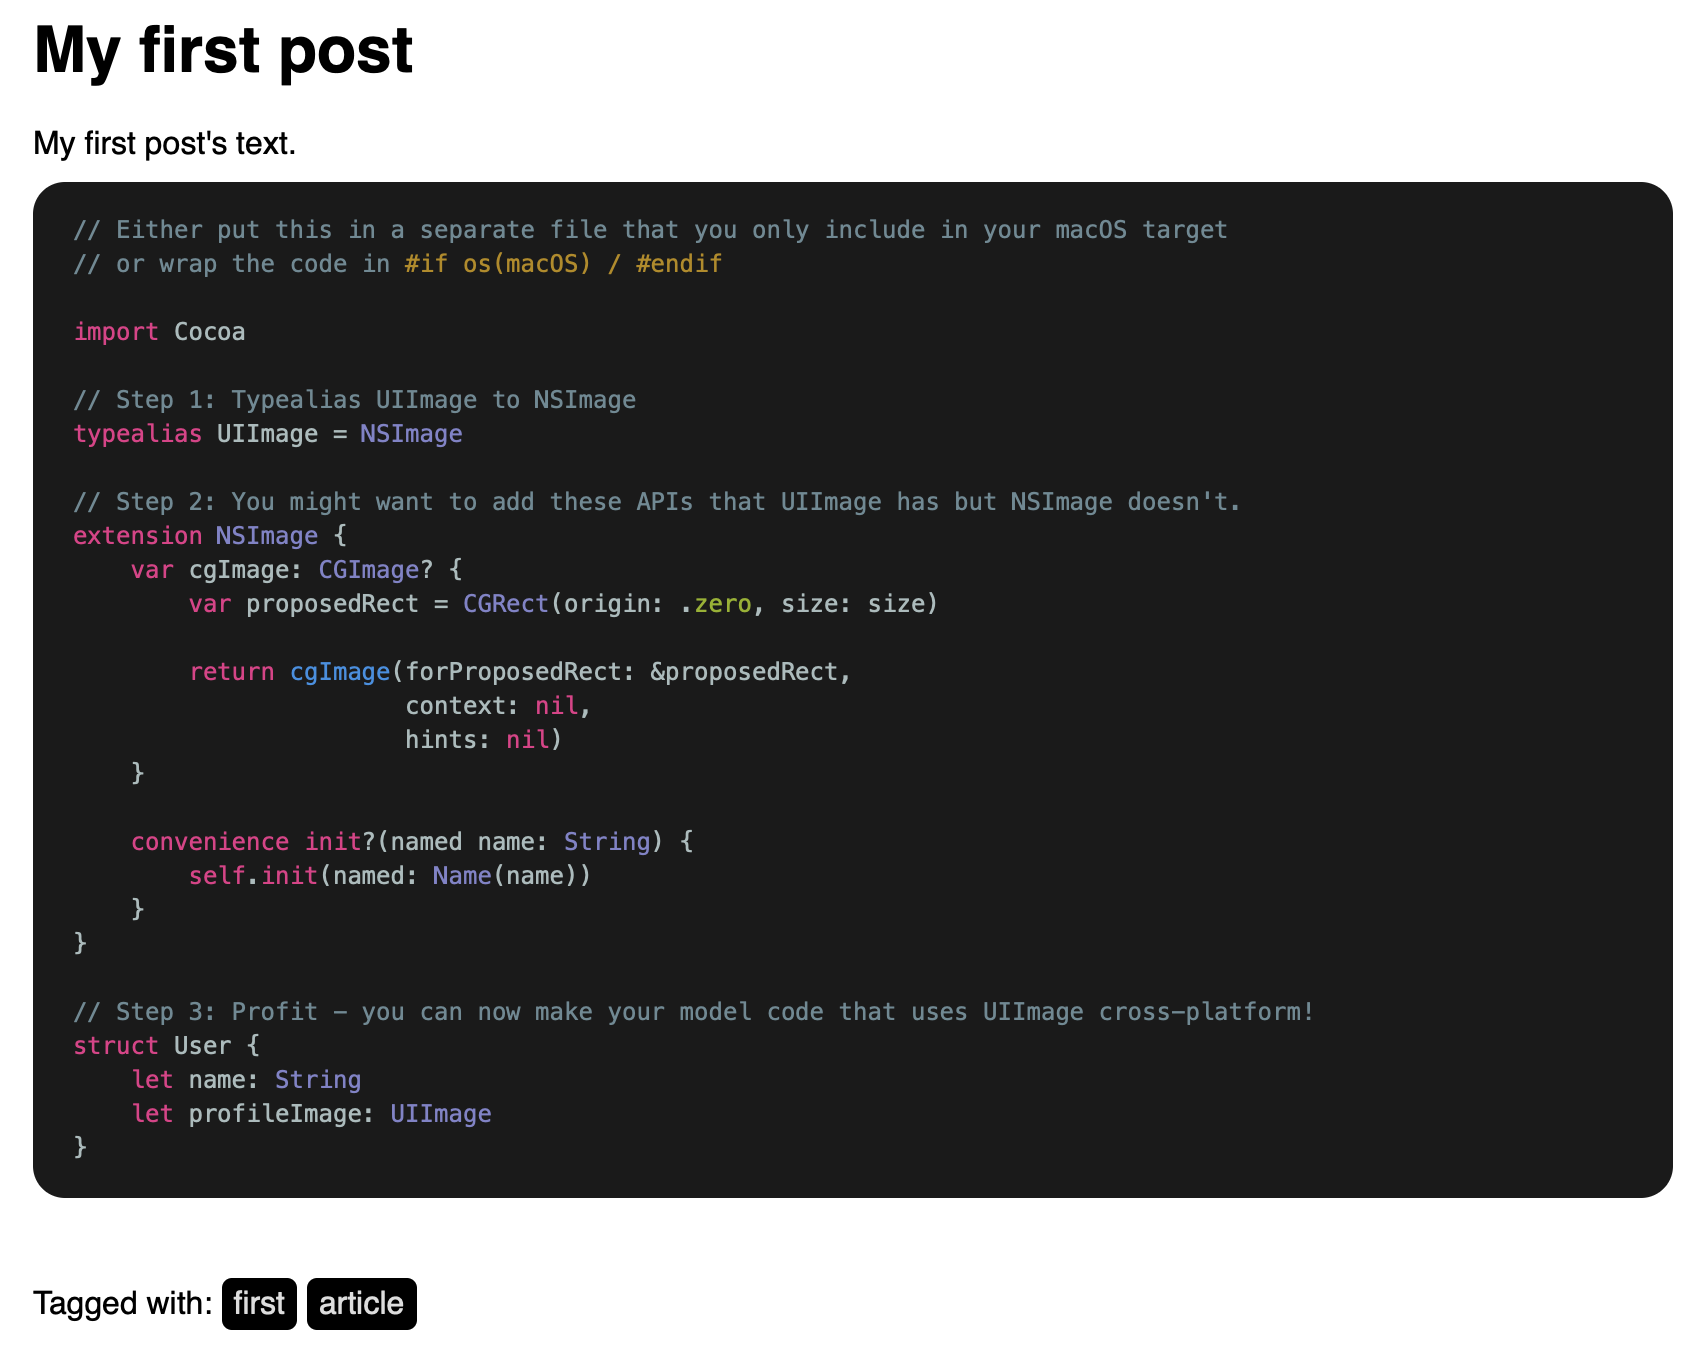
Let's reload again and ... voilà !
🛠 Demo
A Publish Demo project is available to test the integration of the GistPublishPlugin.
🙏🏼 Source of inspiration
The TwitterPublishPlugin was a great source of inspiration for fetching gist from the GitHub API (like the fetch of a Tweet in the TwitterPublishPlugin), rendering it and so on.
The Splash Swift package and the Splash Publish Plugin were very helpful too.
GitHub
| link |
| Stars: 5 |
| Last commit: 1 year ago |
Dependencies
Release Notes
Update Publish version (0.9.0) and swift-tools-version (5.5)
Swiftpack is being maintained by Petr Pavlik | @ptrpavlik | @swiftpackco | API | Analytics