Bumblebee is an abstract text processing and pattern matching engine in Swift (using regular expressions). This provides support for things like basic markdown tags or highlight user names, links, emails, etc. It takes a string and converts it to a NSAttributedString. Several common patterns are include to make implementation easy and quick.
Features
- Abstract and simple. Creating patterns is simple, yet flexible.
- Simple concise codebase at just a few hundred LOC.
Examples
First thing is to import the framework. See the Installation instructions on how to add the framework to your project.
import Bumblebee
This is a simple code example, but showcases a powerful use case.
//add the label to the view
let label = UILabel(frame: CGRect(x: 0, y: 65, width: view.frame.size.width, height: 400))
label.numberOfLines = 0
view.addSubview(label)
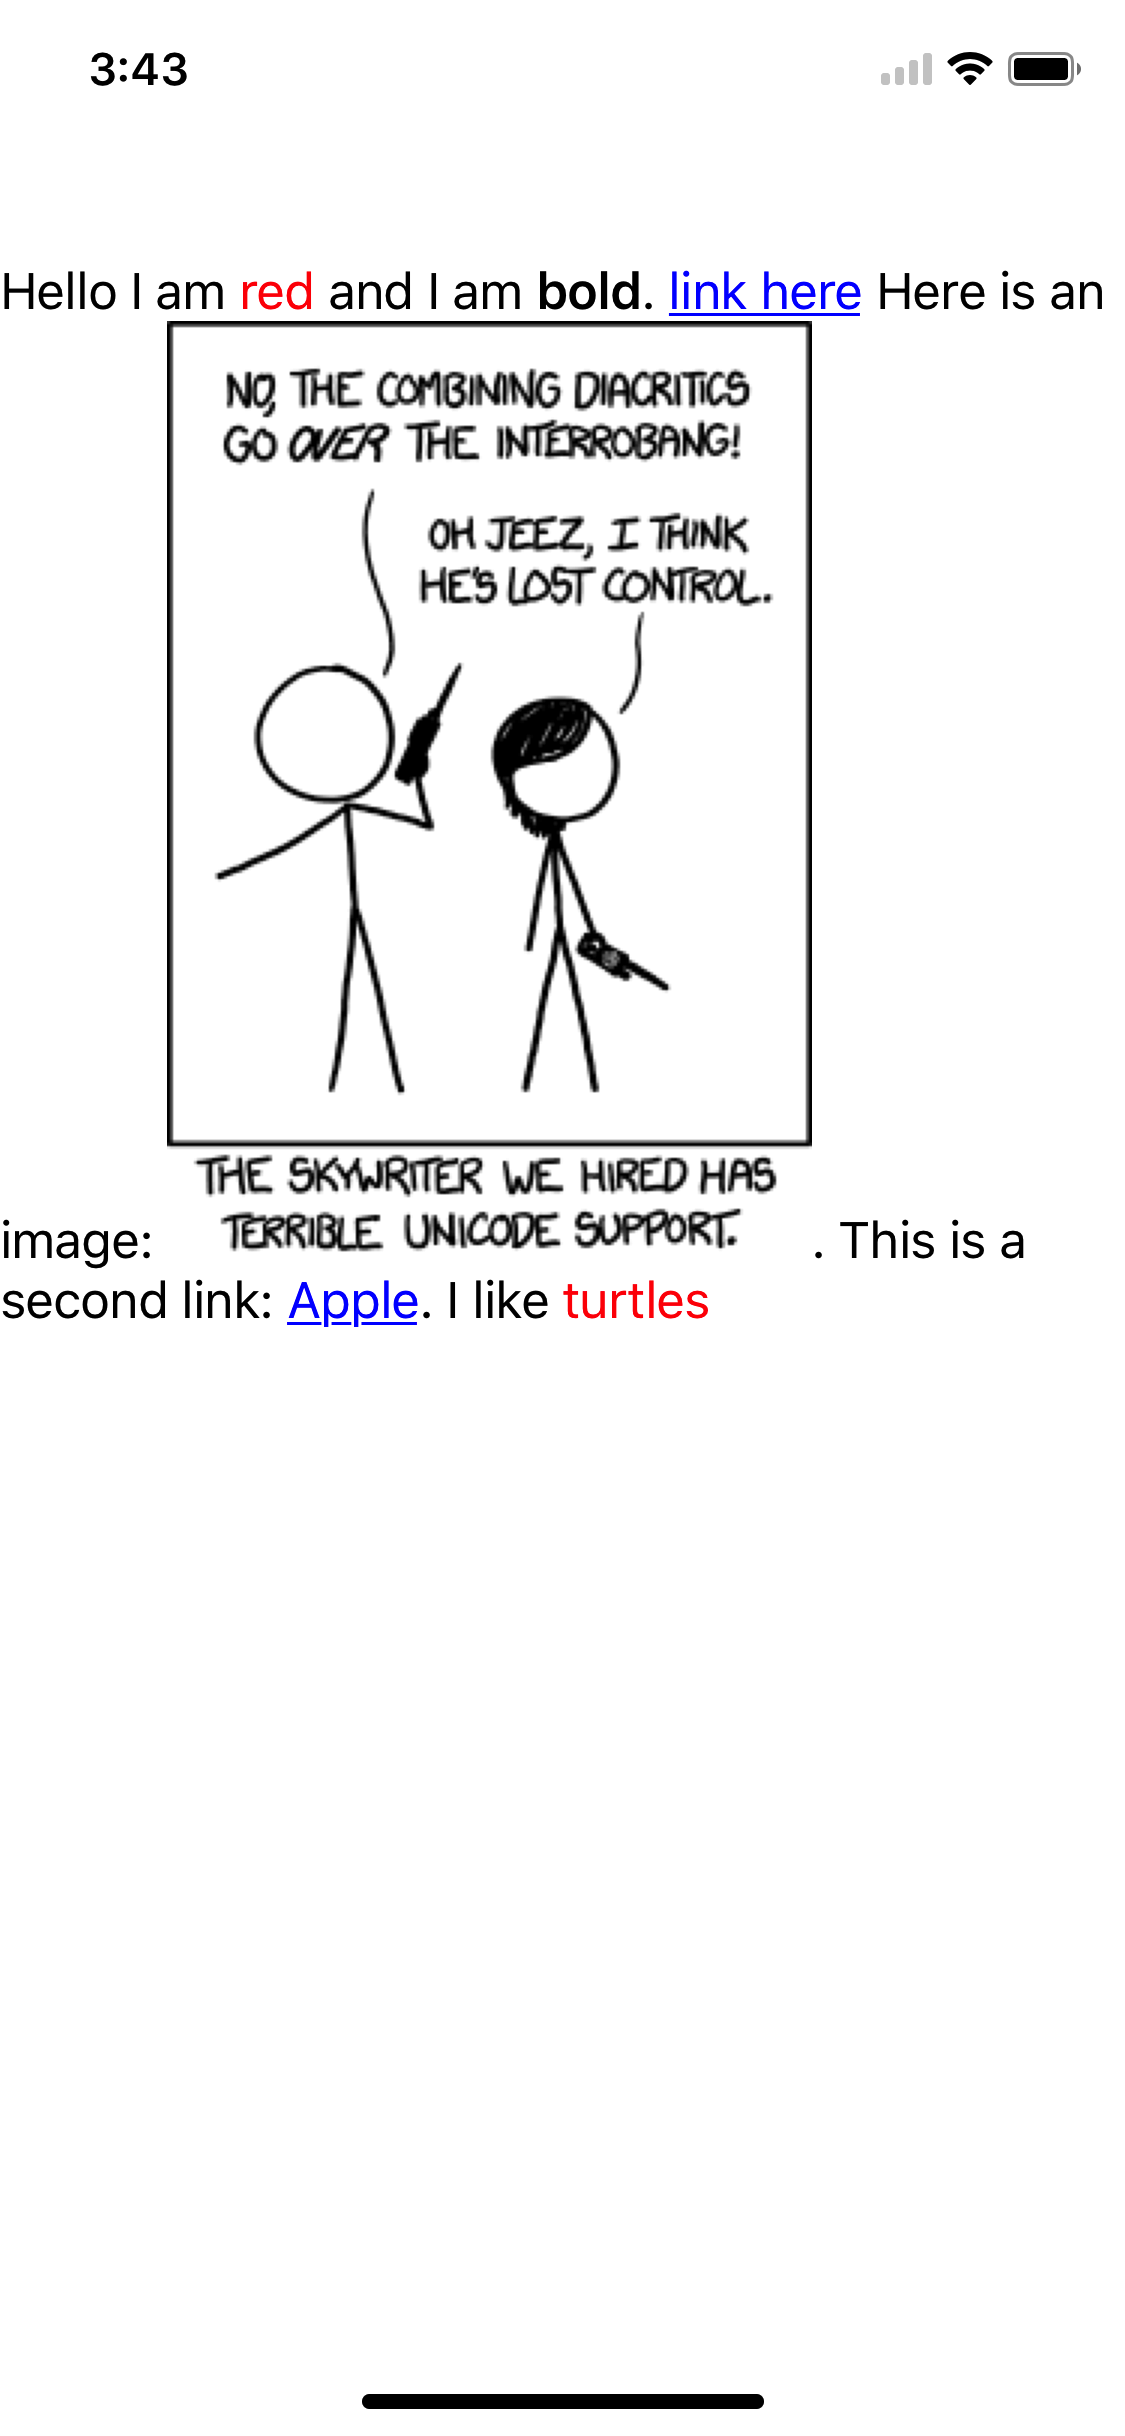
let rawText = "Hello I am *red* and I am __bold__. [link here](http://vluxe.io/) Here is an image: . This is a second link: [Apple](https://apple.com). I like *turtles*"
parser.add(pattern: MDLinkPattern()) { (str, attributes) in
let link = attributes![MDLinkPattern.linkAttribute]!
return MatchedResponse(string: str, attributes: [NSAttributedStringKey.foregroundColor: UIColor.blue,
NSAttributedStringKey.link: URL(string: link)!])
}
parser.add(pattern: MDImagePattern()) { (str, attributes) in
let link = attributes![MDImagePattern.linkAttribute]!
let textAttachment = NSTextAttachment(data: nil, ofType: nil)
HTTP.GET(link) { (response) in
let img = UIImage(data: response.data)!
textAttachment.image = UIImage(data: response.data)
textAttachment.bounds = CGRect(x: 0, y: 0, width: img.size.width, height: img.size.height)
DispatchQueue.main.async {
label.setNeedsDisplay() //tell our label to redraw now that we have our image
}
}
return MatchedResponse(string: str, attributes: [NSAttributedStringKey.attachment: textAttachment])
}
parser.add(pattern: MDBoldPattern()) { (str, attributes) in
return MatchedResponse(string: str, attributes: [NSAttributedStringKey.font: UIFont.boldSystemFont(ofSize: 17)])
}
parser.add(pattern: MDEmphasisPattern()) { (str, attributes) in
return MatchedResponse(string: str, attributes: [NSAttributedStringKey.foregroundColor: UIColor.red])
}
parser.process(text: rawText) { (attrString) in
label.attributedText = attrString
}
Which looks like:
Details
The patterns are processed with regular expressions. Creating custom patterns is accomplished be implementing the Pattern protocol.
//Matches URLs. e.g. (http://domain.com/url/etc)
public struct LinkPattern : Pattern {
    public init() {} //only need to allow public initialization
    public func regex() throws -> NSRegularExpression {
        return try NSDataDetector(types: NSTextCheckingResult.CheckingType.link.rawValue)
    }
}

//Matches typical user name patterns from social platforms like twitter. (@daltoniam, etc)
public struct UserNamePattern : Pattern {
    public init() {} //only need to allow public initialization
    public func regex() throws -> NSRegularExpression {
        //twitter requires between 4 and 15 char for a user name, but hightlights the user name at one char...
        //so I'm using {1,15} instead of {4,15}, but could be easily changed depending on requirements
        return try NSRegularExpression(pattern: "(?<=\\s|^)@[a-zA-Z0-9_]{1,15}\\b", options: .caseInsensitive)
    }
}

//Matches hex strings to convert them to their proper unicode version.
public struct UnicodePattern : Pattern {
    public init() {} //only need to allow public initialization
    public func regex() throws -> NSRegularExpression {
        return try NSRegularExpression(pattern: "(?<=\\s|^)U\\+[a-zA-Z0-9]{2,6}\\b", options: .caseInsensitive)
    }

    //The transform method allows a pattern to do pre processing on the text before it shows up in the matched closure.
    //convert the hex to its proper Unicode scalar. e.g. (U+1F602 to 😂)
    public func transform(text: String) -> (text: String, attributes: [String: String]?) {
        let offset = text.index(text.startIndex, offsetBy: 2)
        let hex = String(text[offset..<text.endIndex])
        if let i = Int(hex, radix: 16) {
            let scalar = UnicodeScalar(i)
            if let scalar = scalar {
                return (text: String(Character(scalar)), attributes: nil)
            }
        }
        return (text: text, attributes: nil)
    }
}

//your custom pattern!
public struct MyCustomPattern : Pattern {
    public init() {} //only need to allow public initialization
    public func regex() throws -> NSRegularExpression {
        return try NSDataDetector(types: NSTextCheckingResult.CheckingType.address.rawValue)
    }
}
Then just call:
//your custom pattern here!
parser.add(pattern: MyCustomPattern()) { (str, attributes) in
    return MatchedResponse(string: str, attributes: [NSAttributedStringKey.foregroundColor: UIColor.purple])
}
See more examples at the bottom of the bumblebee.swift file.
Installation
CocoaPods
Check out Get Started tab on cocoapods.org.
To use Bumblebee in your project add the following 'Podfile' to your project
source 'https://github.com/CocoaPods/Specs.git'
platform :ios, '10.0'
use_frameworks!

pod 'Bumblebee', '~> 2.0.0'
Then run:
pod install
Carthage
Check out the Carthage docs on how to add a install. The Bumblebee framework is already setup with shared schemes.
Rogue
First see the installation docs for how to install Rogue.
To install Bumblebee run the command below in the directory you created the rogue file.
rogue add https://github.com/daltoniam/bumblebee
Next open the libs folder and add the Bumblebee.xcodeproj to your Xcode project. Once that is complete, in your "Build Phases" add the Bumblebee.framework to your "Link Binary with Libraries" phase. Make sure to add the libs folder to your .gitignore file.
Other
Simply grab the framework (either via git submodule or another package manager).
Add the Bumblebee.xcodeproj to your Xcode project. Once that is complete, in your "Build Phases" add the Bumblebee.framework to your "Link Binary with Libraries" phase.
Add Copy Frameworks Phase
If you are running this in an OSX app or on a physical iOS device you will need to make sure you add the Bumblebee.framework included in your app bundle. To do this, in Xcode, navigate to the target configuration window by clicking on the blue project icon, and selecting the application target under the "Targets" heading in the sidebar. In the tab bar at the top of that window, open the "Build Phases" panel. Expand the "Link Binary with Libraries" group, and add Bumblebee.framework. Click on the + button at the top left of the panel and select "New Copy Files Phase". Rename this new phase to "Copy Frameworks", set the "Destination" to "Frameworks", and add Bumblebee.framework.
TODOs
- ☐ Finish Unit Tests
License
Bumblebee is licensed under the Apache v2 License.
Contact
Dalton Cherry
GitHub
| link |
| Stars: 108 |
| Last commit: 5 years ago |
Swiftpack is being maintained by Petr Pavlik | @ptrpavlik | @swiftpackco | API | Analytics