Whats New Template for iOS/Swift
![]()
![]()


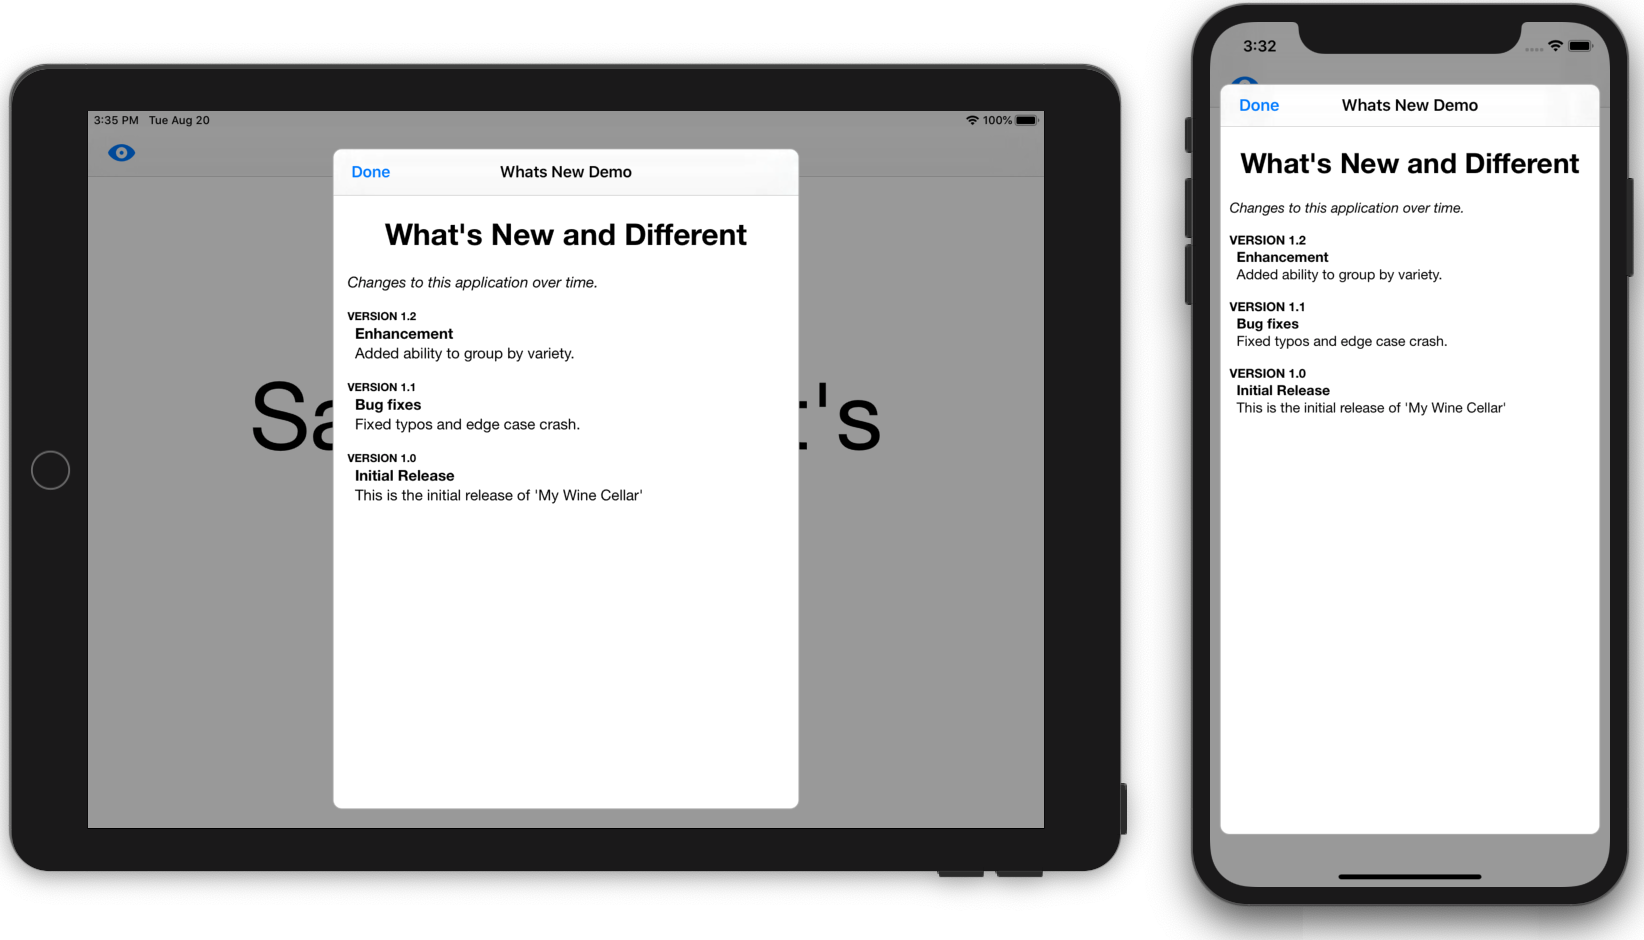
A template for displaying new features (and past feature additions) to your app. The What's New screen will be displayed over the entire context of your application so if your app supports a split view controller, the What's new screen will be displayed modally over both views. To preserve a reasonable appearance on an iPad, the maximum width of the Whats's New screen will be 500px.
Requirements
- iOS 12.0+
- Xcode 11.0+
- Swift 5.0+
YouTube Video
See overview along with installation and setup instructions at:
https://www.youtube.com/watch?v=OuhPgUaCzX8
Installation
- From within Xcode 11 or later, choose File > Swift Packages > Add Package Dependency
- At the next screen enter https://github.com/StewartLynch/CTWhatsNew.git when asked to choose a Package repository
- Choose the latest available version.
- Add the package to your target.
You now have the dependency installed and are ready to import CTWhatsNew
Set up
Setting up to present CTWhatsNew.
Step 1 - Import CTWhatsNew
In the ViewController where you are going to implement CTWhatsNew.
import CTWhatsNew
Step 2 - Create an instance of CTWhatsNew
If you are going to present the CTWhatsNew screen only when your app's version or build has changed, you can create the instance of CTWhatsNew in the viewDidAppear() of your opening initial ViewController. This means that it will only appear when a user installs a newer version of your app. If you want to display the screen on demand, then you can create the instance within the IBOutlet action itself.
To create the instance, you must also pass the title and intro text. This will be used at the top of the display to introduce the changes in general.
let whatsNew = CTWhatsNew(title: "What's New and Different", intro: "Changes to this application over time.")
Step 3 - Create CTWhatsNewItems
The next step is to create a CTWhatsNewItem for every update that you wish to display. To do this you can use newItem function on your whatsNew instance and combine it with the static CTWhatsNewItem function. You could, of course create a number of CTWhatsNewItems individually and then use the whatsNew function to add them all to your instance later, but in this example, I am showing you the combination of both.
Note: The order in which you add the CTWhatsNew item will be reversed on display. So you can add your most recent changes at the end, and they will be displayed first.
whatsNew.newItem(CTWhatsNewItem(version: "1.0",
                                versionTitle: "Initial Release",
                                description: "This is the initial release."))
whatsNew.newItem(CTWhatsNewItem(version: "1.1",
                                versionTitle: "Bug fixes",
                                description: "Fixed typos and edge case crash."))
whatsNew.newItem(CTWhatsNewItem(version: "1.2",
                                versionTitle: "Enhancement",
                                description: "Added ability to group by variety."))
Step 4 - Present the CTWhatsNew screen
Conditional Presentation
The original intent of What's new was to only present the screen once for every new build installed. If this is how you wish to use it, simply add the following to the after creating your items
CTWhatsNew.showWhatsNew(on: self, whatsNew: whatsNew)
When this function is called, it checks the version and build number of your app and compares it to a string stored in UserDefaults. If it is not found, or does not match the currently running app, the What's New screen will be displayed.
When the screen is dismissed, the current version and build number of your app is stored and will thus prevent the display of What's new in future launches.
On Demand presentation
If you wish to display whats new on demand, you can assign it to an action on a button. If this is the case, add isOnDemand:true as the final parameter.
CTWhatsNew.showWhatsNew(on: self, whatsNew: whatsNew, isOnDemand: true)
Optional Parameters
As are three additional optional parameters that you can pass to the CTWhatsNew.showWhatsNew function that will change the color of the CTWhatsNew` navigation bar and the colors of the Done button and the navigation bar title.
Note: The default colors support dark mode if you are using CTWhatsNew on a device running iOS 13 or later. If you are going to customize the colors, ensure that you include dark mode supported color sets.
These three colors are:
- navBarBarTintColor - the background color of the navigation bar
- navBarTintColor - the navigation bar done button color
- navBarTitleColor - the color for the title
To pass these on to the function, you can add these as the 3rd and 4th and 5th parameters. Each one is optional so you may choose to leave one or more out.
Here is an example of a CTWhatsNew.showWhatsNew call using all options.
CTWhatsNew.showWhatsNew(on: self,
                        whatsNew: whatsNew,
                        navBarBarTintColor: .red,
                        navBarTintColor: .white,
                        navBarTitleColor: .yellow,
                        isOnDemand: true)
GitHub
| link |
| Stars: 1 |
| Last commit: 4 years ago |
Related Packages
Swiftpack is being maintained by Petr Pavlik | @ptrpavlik | @swiftpackco | API | Analytics