ios-multichannel-widget
Requirements
- iOS 10.0+
- minimum Xcode 11.4
- Swift 5
Dependency
- Alamofire
- AlamofireImage
- SwiftyJSON
- QiscusCoreAPI
- SDWebImage
Installation
CocoaPods
CocoaPods is a dependency manager for Cocoa projects. For usage and installation instructions, visit their website. To integrate MultichannelWidget into your Xcode project using CocoaPods, specify it in your Podfile:
pod 'MultichannelWidget', '~> 1.1.6'
Carthage
Carthage is a decentralized dependency manager that builds your dependencies and provides you with binary frameworks. To integrate MultichannelWidget into your Xcode project using Carthage, specify it in your Cartfile:
github "Qiscus-Integration/ios-multichannel-widget"
How to use
Initialization
To use the widget you will need to initialize MultichannelWidget, in order to do this you will need APP_ID.
let widget = MultichannelWidget(appID: YOUR_APP_ID)
after the initialization, you can access all the widget's function.
Set the user
set the widget's user (this is mandatory before you can start to chat).
widget.setUser(id: "user01", displayName: "Cus Tom R", avatarUrl: "https://customer.avatar-url.com")
Get login status
you can check whether the user has already logged in.
widget.isLoggedIn()
Start Chatting
Before start chatting, please don't for get to set the user. After the user has been set you can start chatting using this function.
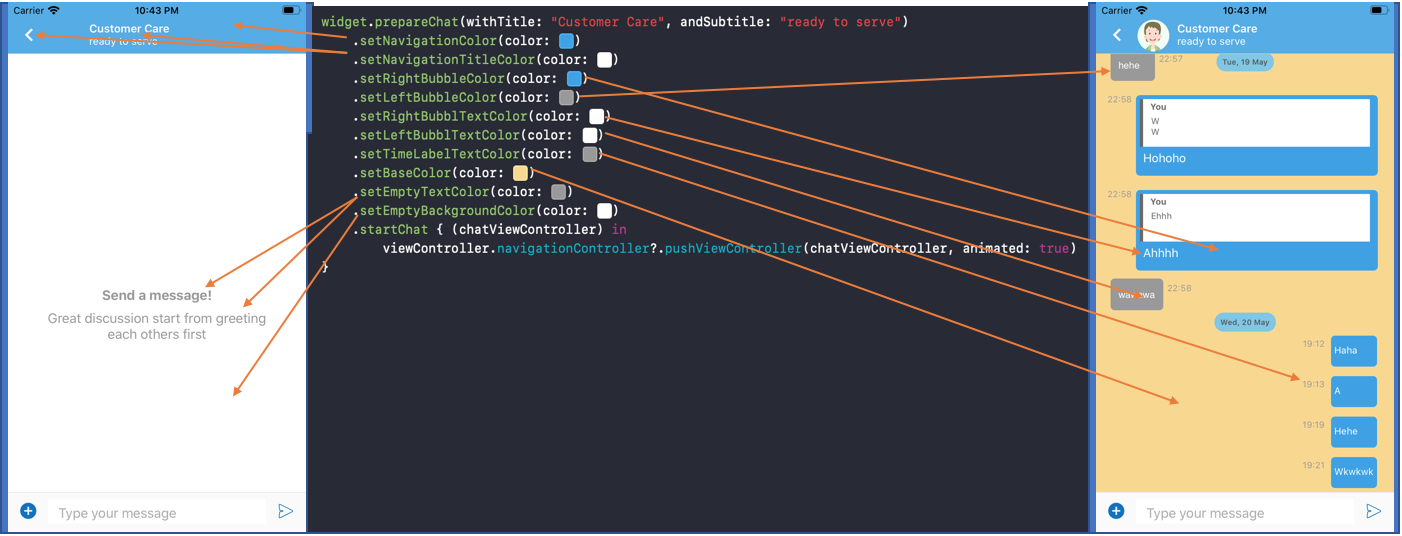
widget.prepareChat(withTitle: "Customer Care", andSubtitle: "ready to serve").startChat { (chatViewController) in

    someViewController.navigationController?.pushViewController(chatViewController, animated: true)
}
Color Customization
You can customize widget components color befor start chatting.
Clear User
You will need to call this function to clear logged in user.
widget.clearUser()
Hide system message
configure system message visibility by calling setShowSystemMessage(isShowing: Bool).
 widget.prepareChat(withTitle: "Customer Care", andSubtitle: "ready to serve")
            ...
            .setShowSystemMessage(isShowing: false)
            ...
            .startChat { (chatViewController) in
                 viewController.navigationController?.setViewControllers([viewController, chatViewController], animated: true)
            }
Push Notification
In order to have push notification working in your apps, you will need to follow these steps below.
- Create a Certificate Signing Request(CSR).
- Create a Push Notification SSL certificate in Apple Developer site.
- Export a p12 file and upload it to https://support.qiscus.com/hc/en-us/requests/new.
- Register a device token in Multichannel Widget and handle incoming notification.
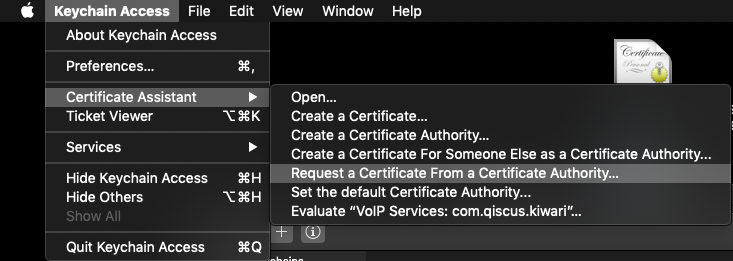
Step Push Notification 1: Create A Certificate Signing Request(CSR)
Open Keychain Access on your Mac (Applications -> Utilities -> Keychain Access). Select Request a Certificate From a Certificate Authority.
In the Certificate Information window, do the following:
- In the User Email Address field, enter your email address.
- In the Common Name field, create a name for your private key (for example, John Doe Dev Key).
- The CA Email Address field must be left empty.
- In the Request is group, select the Saved to disk option.

Step Push Notification 2: Create A Push Notification SSL Certificate In Apple Developer Site.
Log in to the Apple Developer Member Center and find the Certificates, Identifiers & Profiles menu. Select App IDs, find your target application, and click the Edit button.


Turn on Push Notifications and create a development or production certificate to fit your purpose.

Step Push Notification 3: Export A p12 File and Upload It To Qiscus Dashboard
Under the Keychain Access, click the Certificates category from the left menu. Find the Push SSL certificate you just registered and right-click it without expanding the certificate. Then select Export to save the file to your disk.


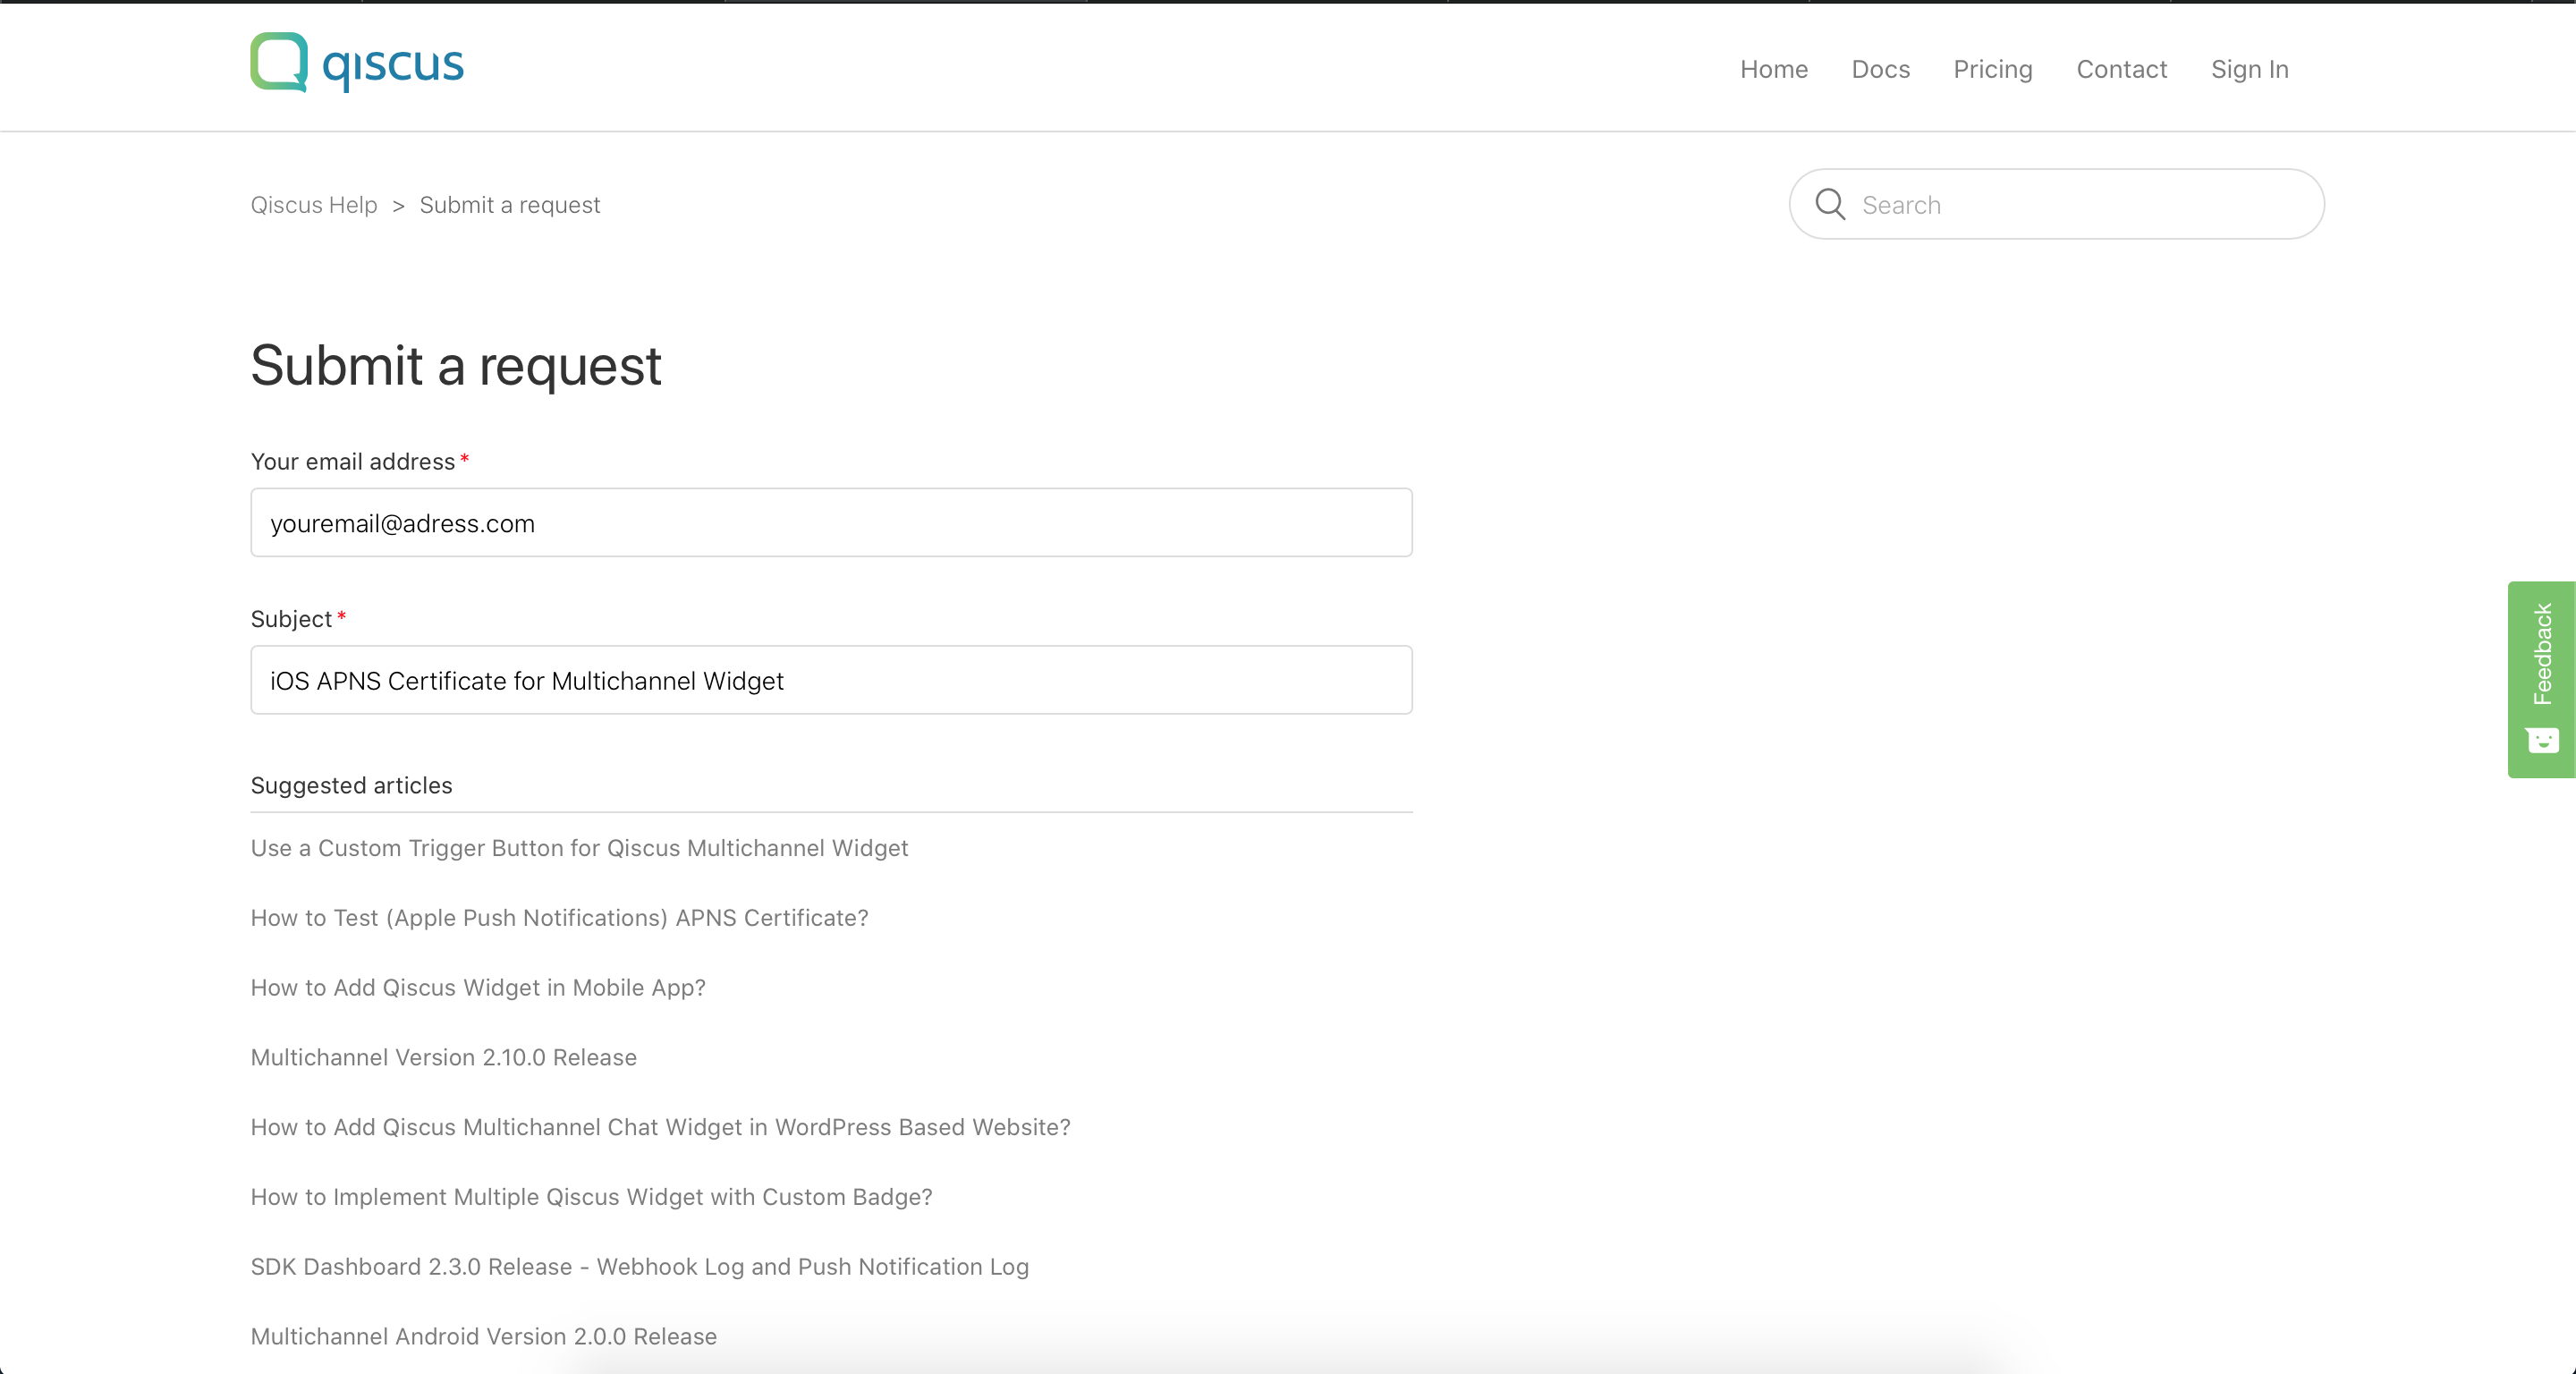
Then, open this submit request page.
fill in your email and subject.
write the description, choose Product Associated (Multichannel CS Chat), choose Category of Query (Multichannel Customer Service Chat), your APP_ID, and the most important is don't forget to attach the .p12 certificate for the APNS push notification.
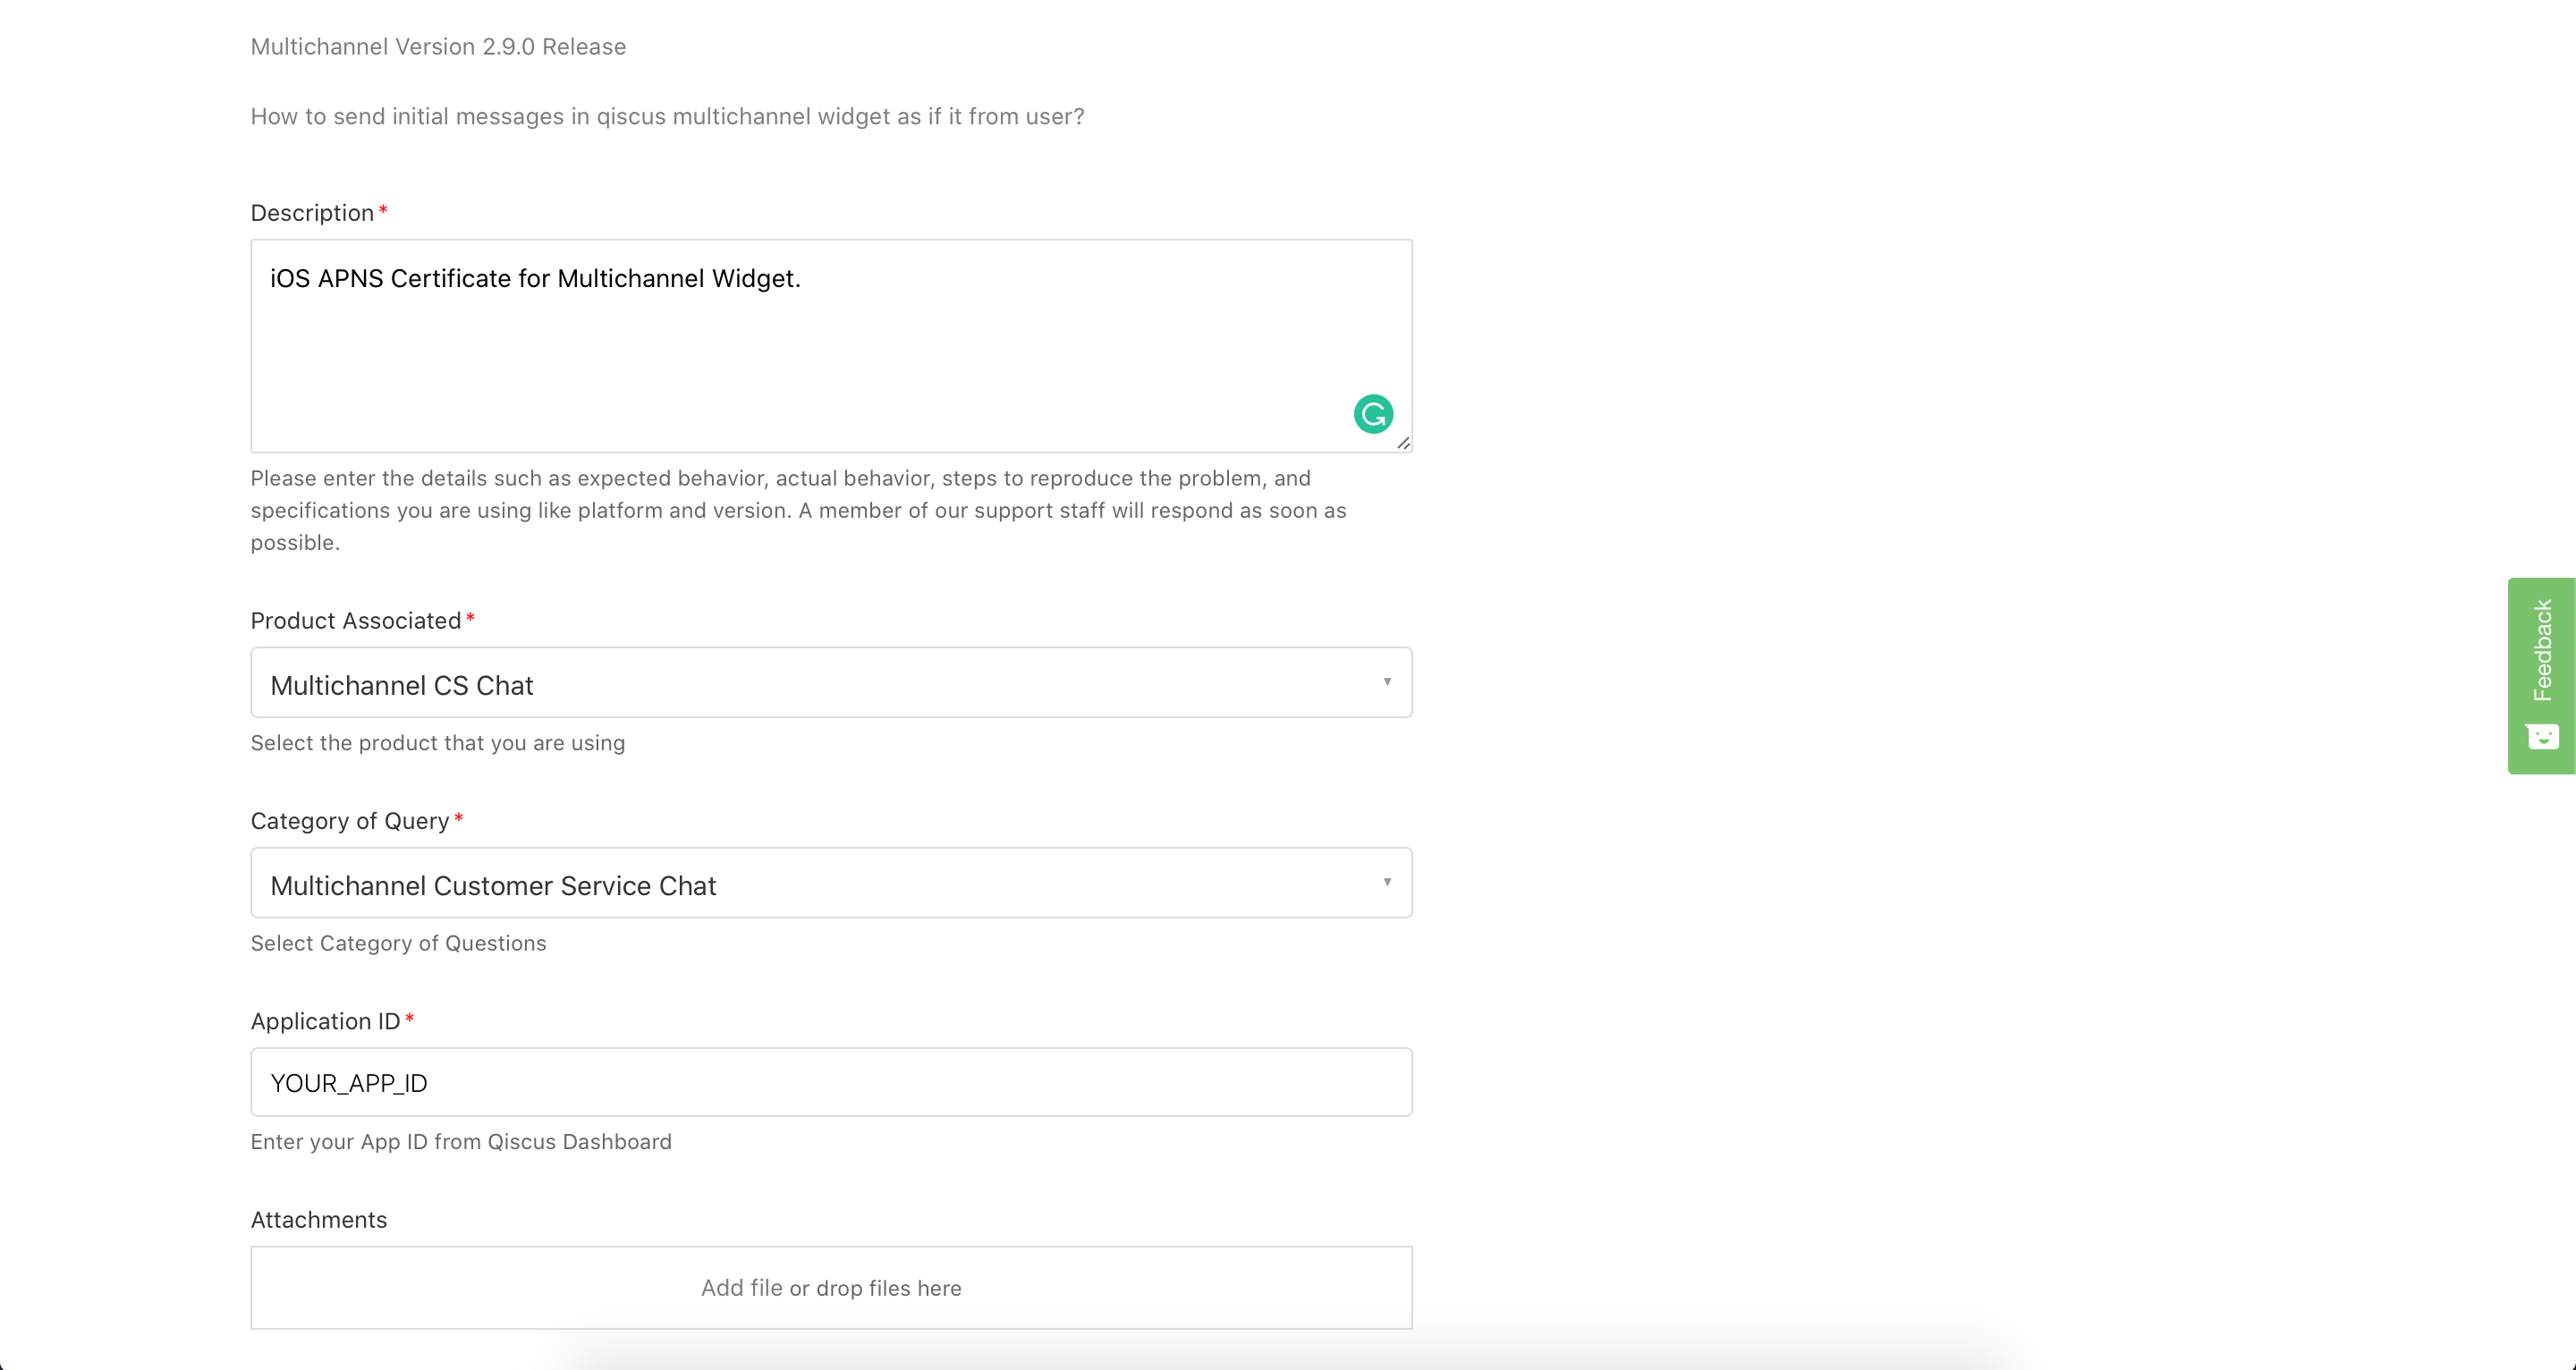
finally you just need to click submit.
**Note:
**Example of this certificate for production, you need create cert Push Notification for development, and Export A p12 File and Attach It To Sbumit Request attachment if you run from Xcode
Step Push Notification 4: Register A Device Token In Multichannel Widget.
create a class to hold the Widget (in this example we will use a Singleton Object class called ChatManager that will wrap the MultichannelWidget functionalities, in this step we will highlight the deviceToken registration and notification tap handling).
final  class  ChatManager {

    static let shared: ChatManager = ChatManager()

    lazy  var  widget: MultichannelWidget = {
        return MultichannelWidget(appID: "YOUR_APP_ID")
    }()

    ...

    func register(deviceToken: Data?) {

        if let deviceToken = deviceToken {
            var tokenString: String = ""
            for i in 0..<deviceToken.count {
                tokenString += String(format: "%02.2hhx", deviceToken[i] as CVarArg)
            }

            self.widget.register(deviceToken: tokenString, isDevelopment: false, onSuccess: { (response) in
                print("Multichannel widget success to register device token")
            }) { (error) in
                print("Multichannel widget failed to register device token")
            }
        }

    }

    func userTapNotification(userInfo : [AnyHashable : Any]) {

        self.widget.tapNotification(userInfo: userInfo)
    }

    ...
}
In your app's AppDelegate, store your device token as a variable.
import  UserNotifications

@UIApplicationMain
class  AppDelegate:  UIResponder,  UIApplicationDelegate {

    func  application(_  application:  UIApplication, didFinishLaunchingWithOptions  launchOptions [UIApplication.LaunchOptionsKey:  Any]?) ->  Bool {

        // MARK : Setup Push Notification
        if  #available(iOS 10.0,  *) {
            // For iOS 10 display notification (sent via APNS)
            UNUserNotificationCenter.current().delegate  =  self
            let  authOptions:  UNAuthorizationOptions  = [.alert, .badge, .sound]
            UNUserNotificationCenter.current().requestAuthorization(
                options:  authOptions,
                completionHandler: {_,  _  in })
        } else {
            let  settings:  UIUserNotificationSettings  =
            UIUserNotificationSettings(types: [.alert, .badge, .sound],  categories:  nil)
            application.registerUserNotificationSettings(settings)
        }

        // MARK : register the app for remote notifications
        application.registerForRemoteNotifications()

        return  true
    }

    func  application(_  application:  UIApplication,  didRegisterForRemoteNotificationsWithDeviceToken  deviceToken:  Data) {

        ChatManager.shared.register(deviceToken:  deviceToken)
    }

    func  application(_  application:  UIApplication,  didReceiveRemoteNotification  userInfo: [AnyHashable  :  Any]) {

        ChatManager.shared.userTapNotification(userInfo: userInfo)
    }
}

// [START ios_10_message_handling]
@available(iOS  10,  *)
extension  AppDelegate  :  UNUserNotificationCenterDelegate {

    // Receive displayed notifications for iOS 10 devices.
    func  userNotificationCenter(_  center:  UNUserNotificationCenter, willPresent  notification:  UNNotification, withCompletionHandler completionHandler: @escaping (UNNotificationPresentationOptions) ->  Void) {

        completionHandler([.alert, .sound])
    }

    func  userNotificationCenter(_  center:  UNUserNotificationCenter, didReceive  response:  UNNotificationResponse, withCompletionHandler  completionHandler: @escaping () ->  Void) {

        let  userInfo  =  response.notification.request.content.userInfo
        ChatManager.shared.userTapNotification(userInfo:  userInfo)
        completionHandler()
    }
}
// [END ios_10_message_handling]
Step Push Notification 6: Test PN from third party
for example using tool Easy APNs Provider :

**Note:
**Follow step 1 - 6 tools to test push notification. **We test using cert Apple Development IOS Push Service
How to run the Example
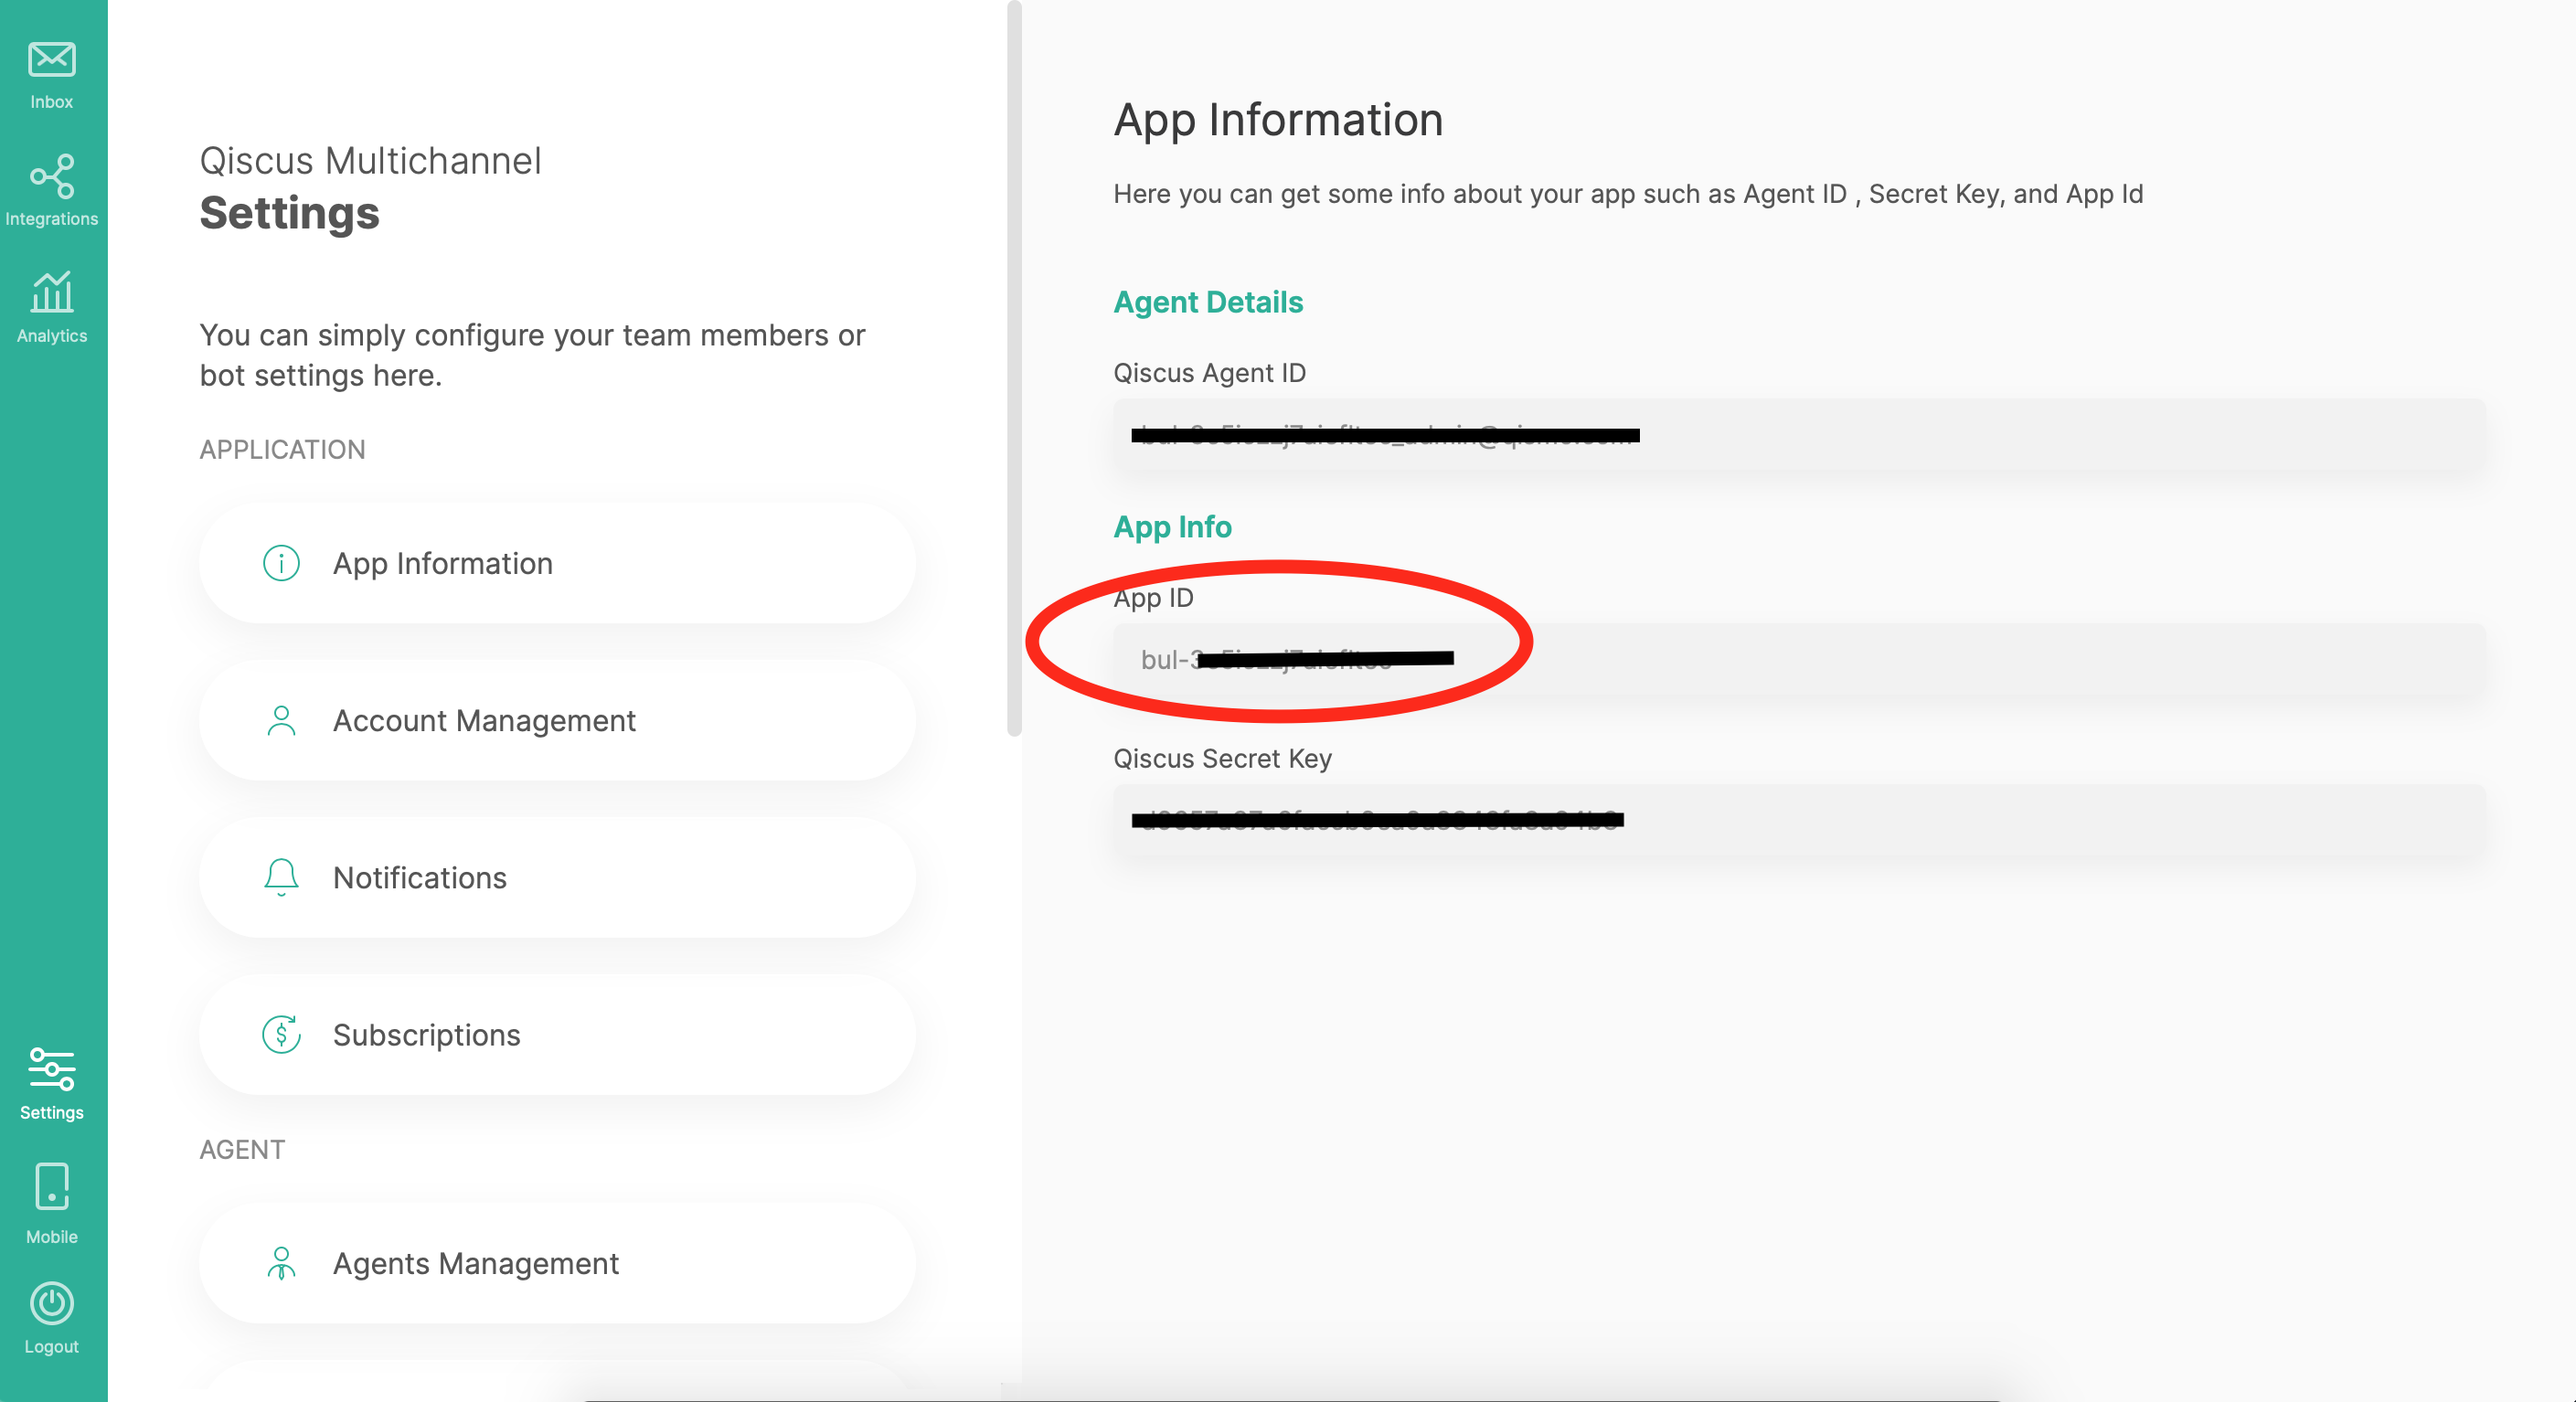
Step 1 : Get Your APP ID
Firstly, you need to register to Qiscus Multichannel, by accessing this link. The APP ID can be retrieved from setting section.
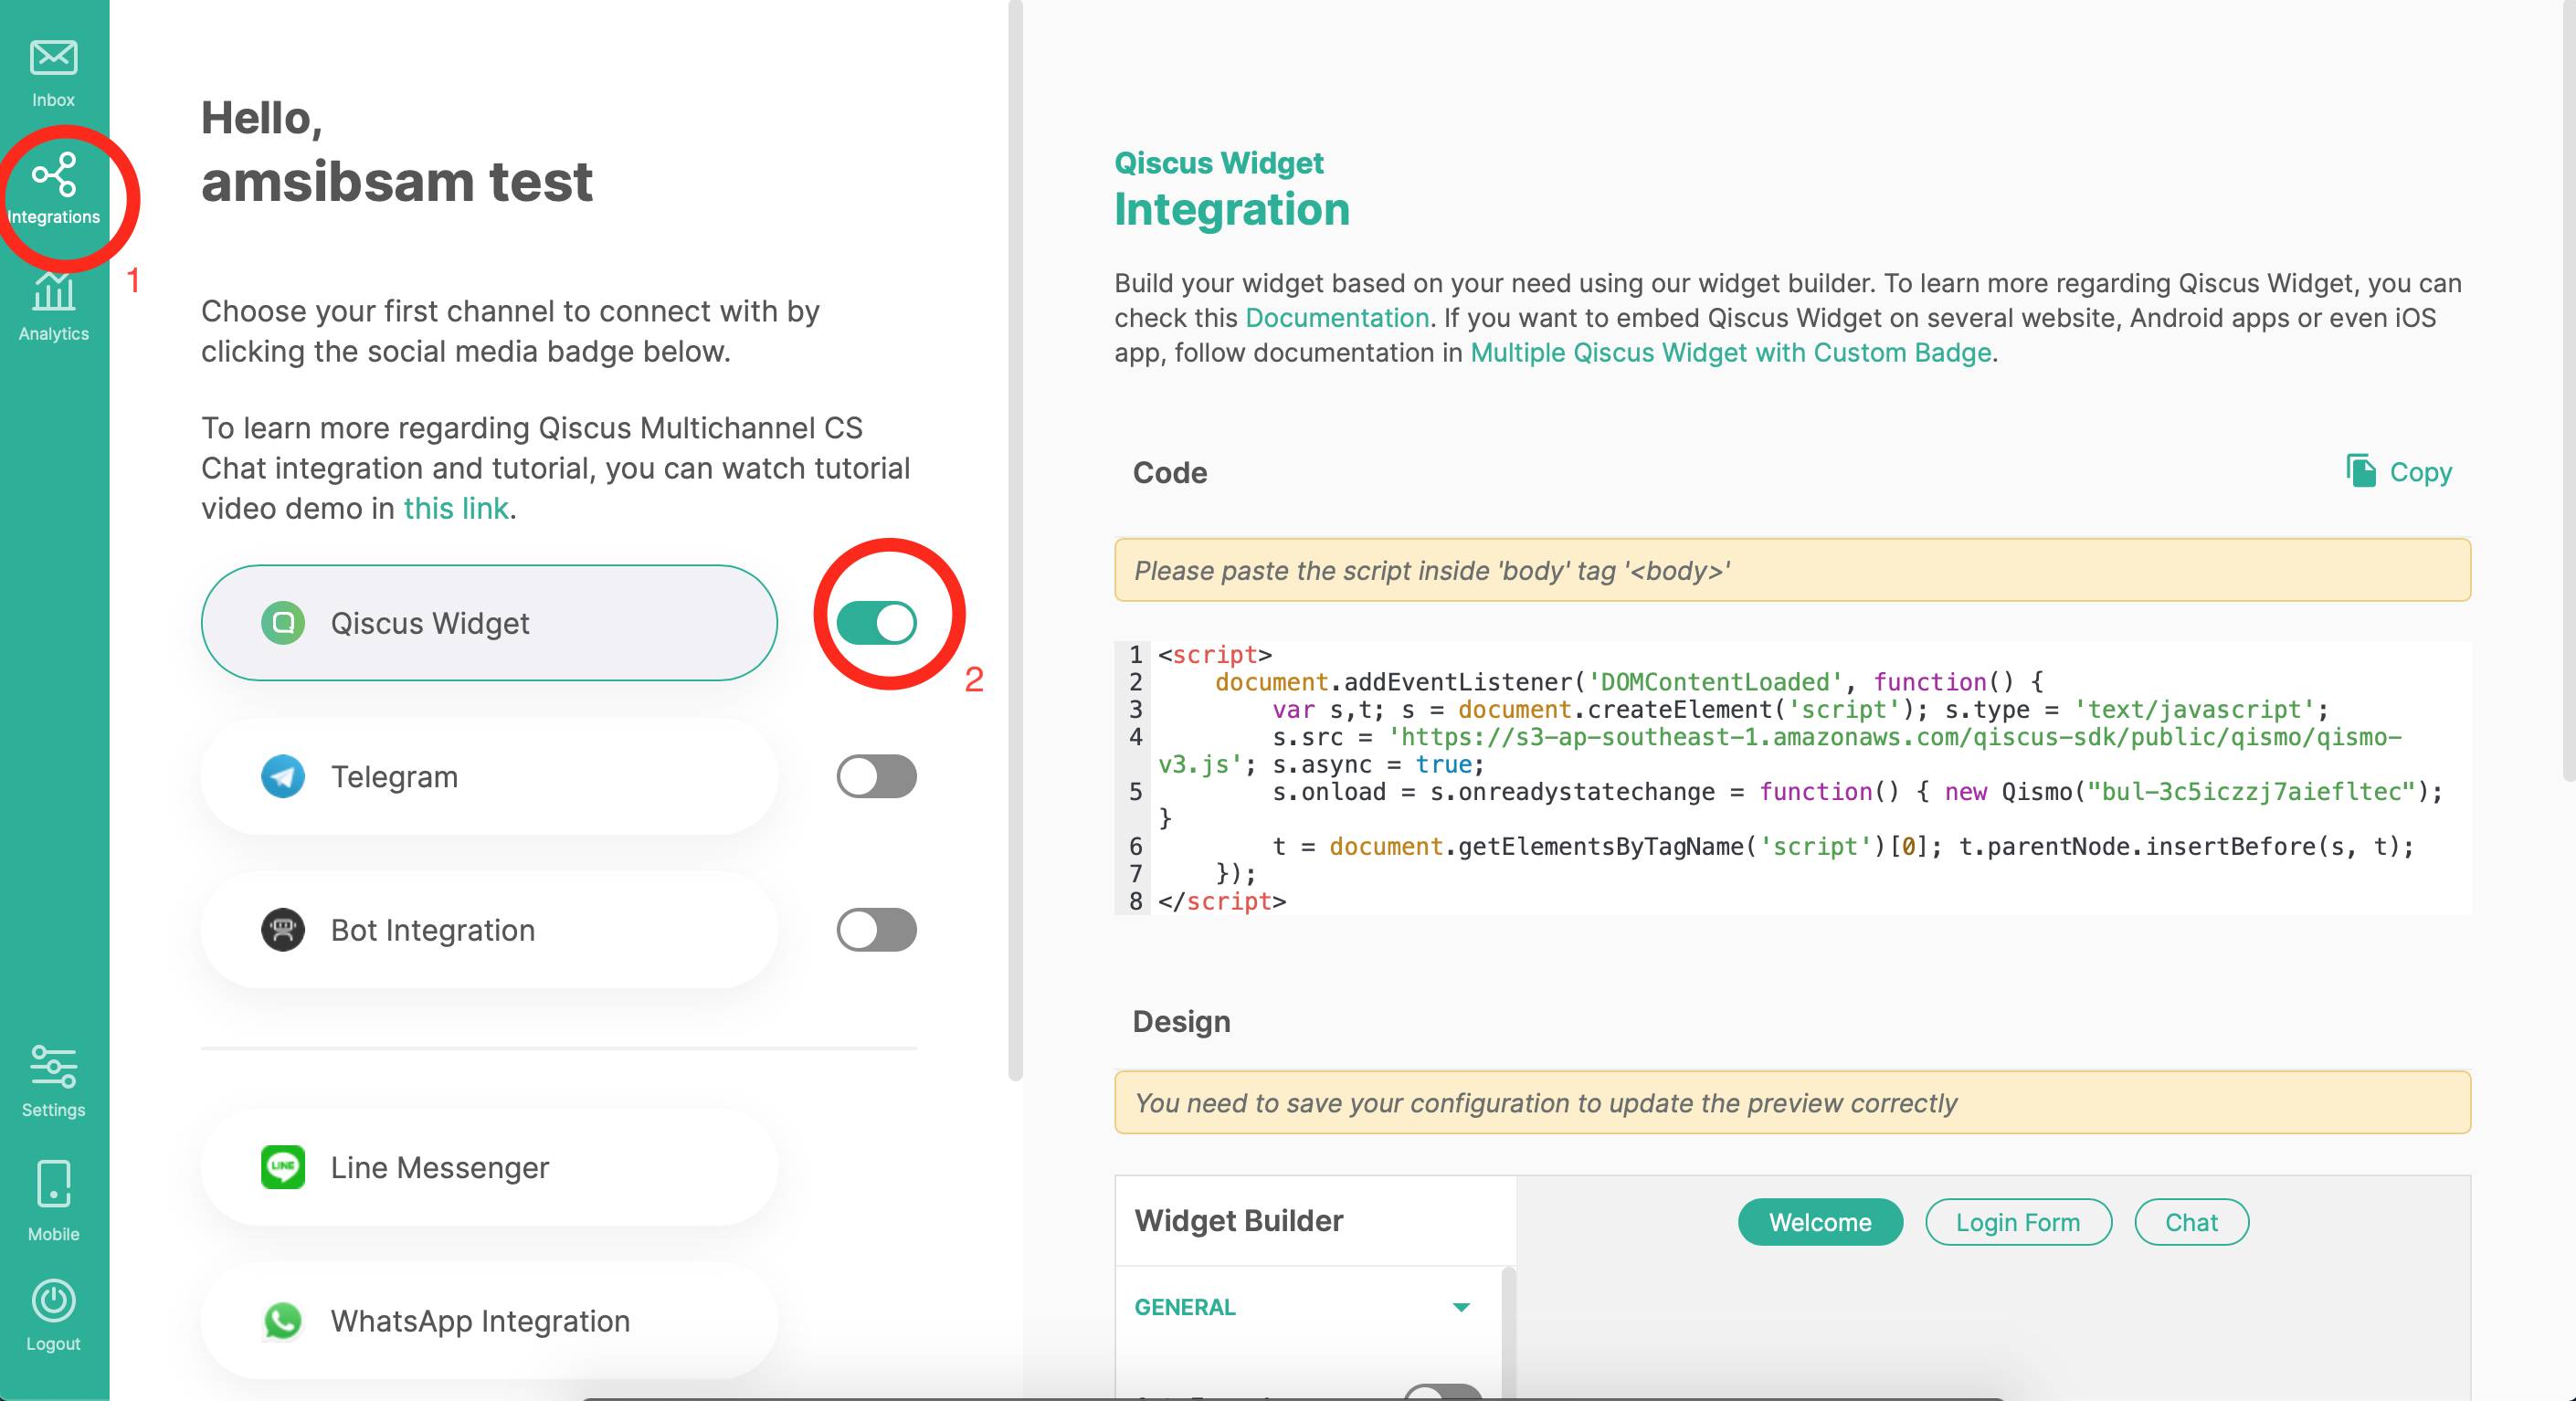
Step 2 : Activate Qiscus Widget Integration
In your Qiscus Multichannel, activate Qiscus Widget Integration.
Step 3 : Run pod install
After cloned the example, you will need to run
pod install
This will install all cocoapods dependencies needed by the Example
Step 4 : Set Your APP ID in Example
Set the example Qiscus Multichannel APP ID you got from step 1. Open Example/ChatManager.swift, replace the appId at line 21 with your APP ID.
lazy  var  widget: MultichannelWidget = {
    return  MultichannelWidget(appID: "YOUR_APP_ID_FROM_STEP_1")
}()
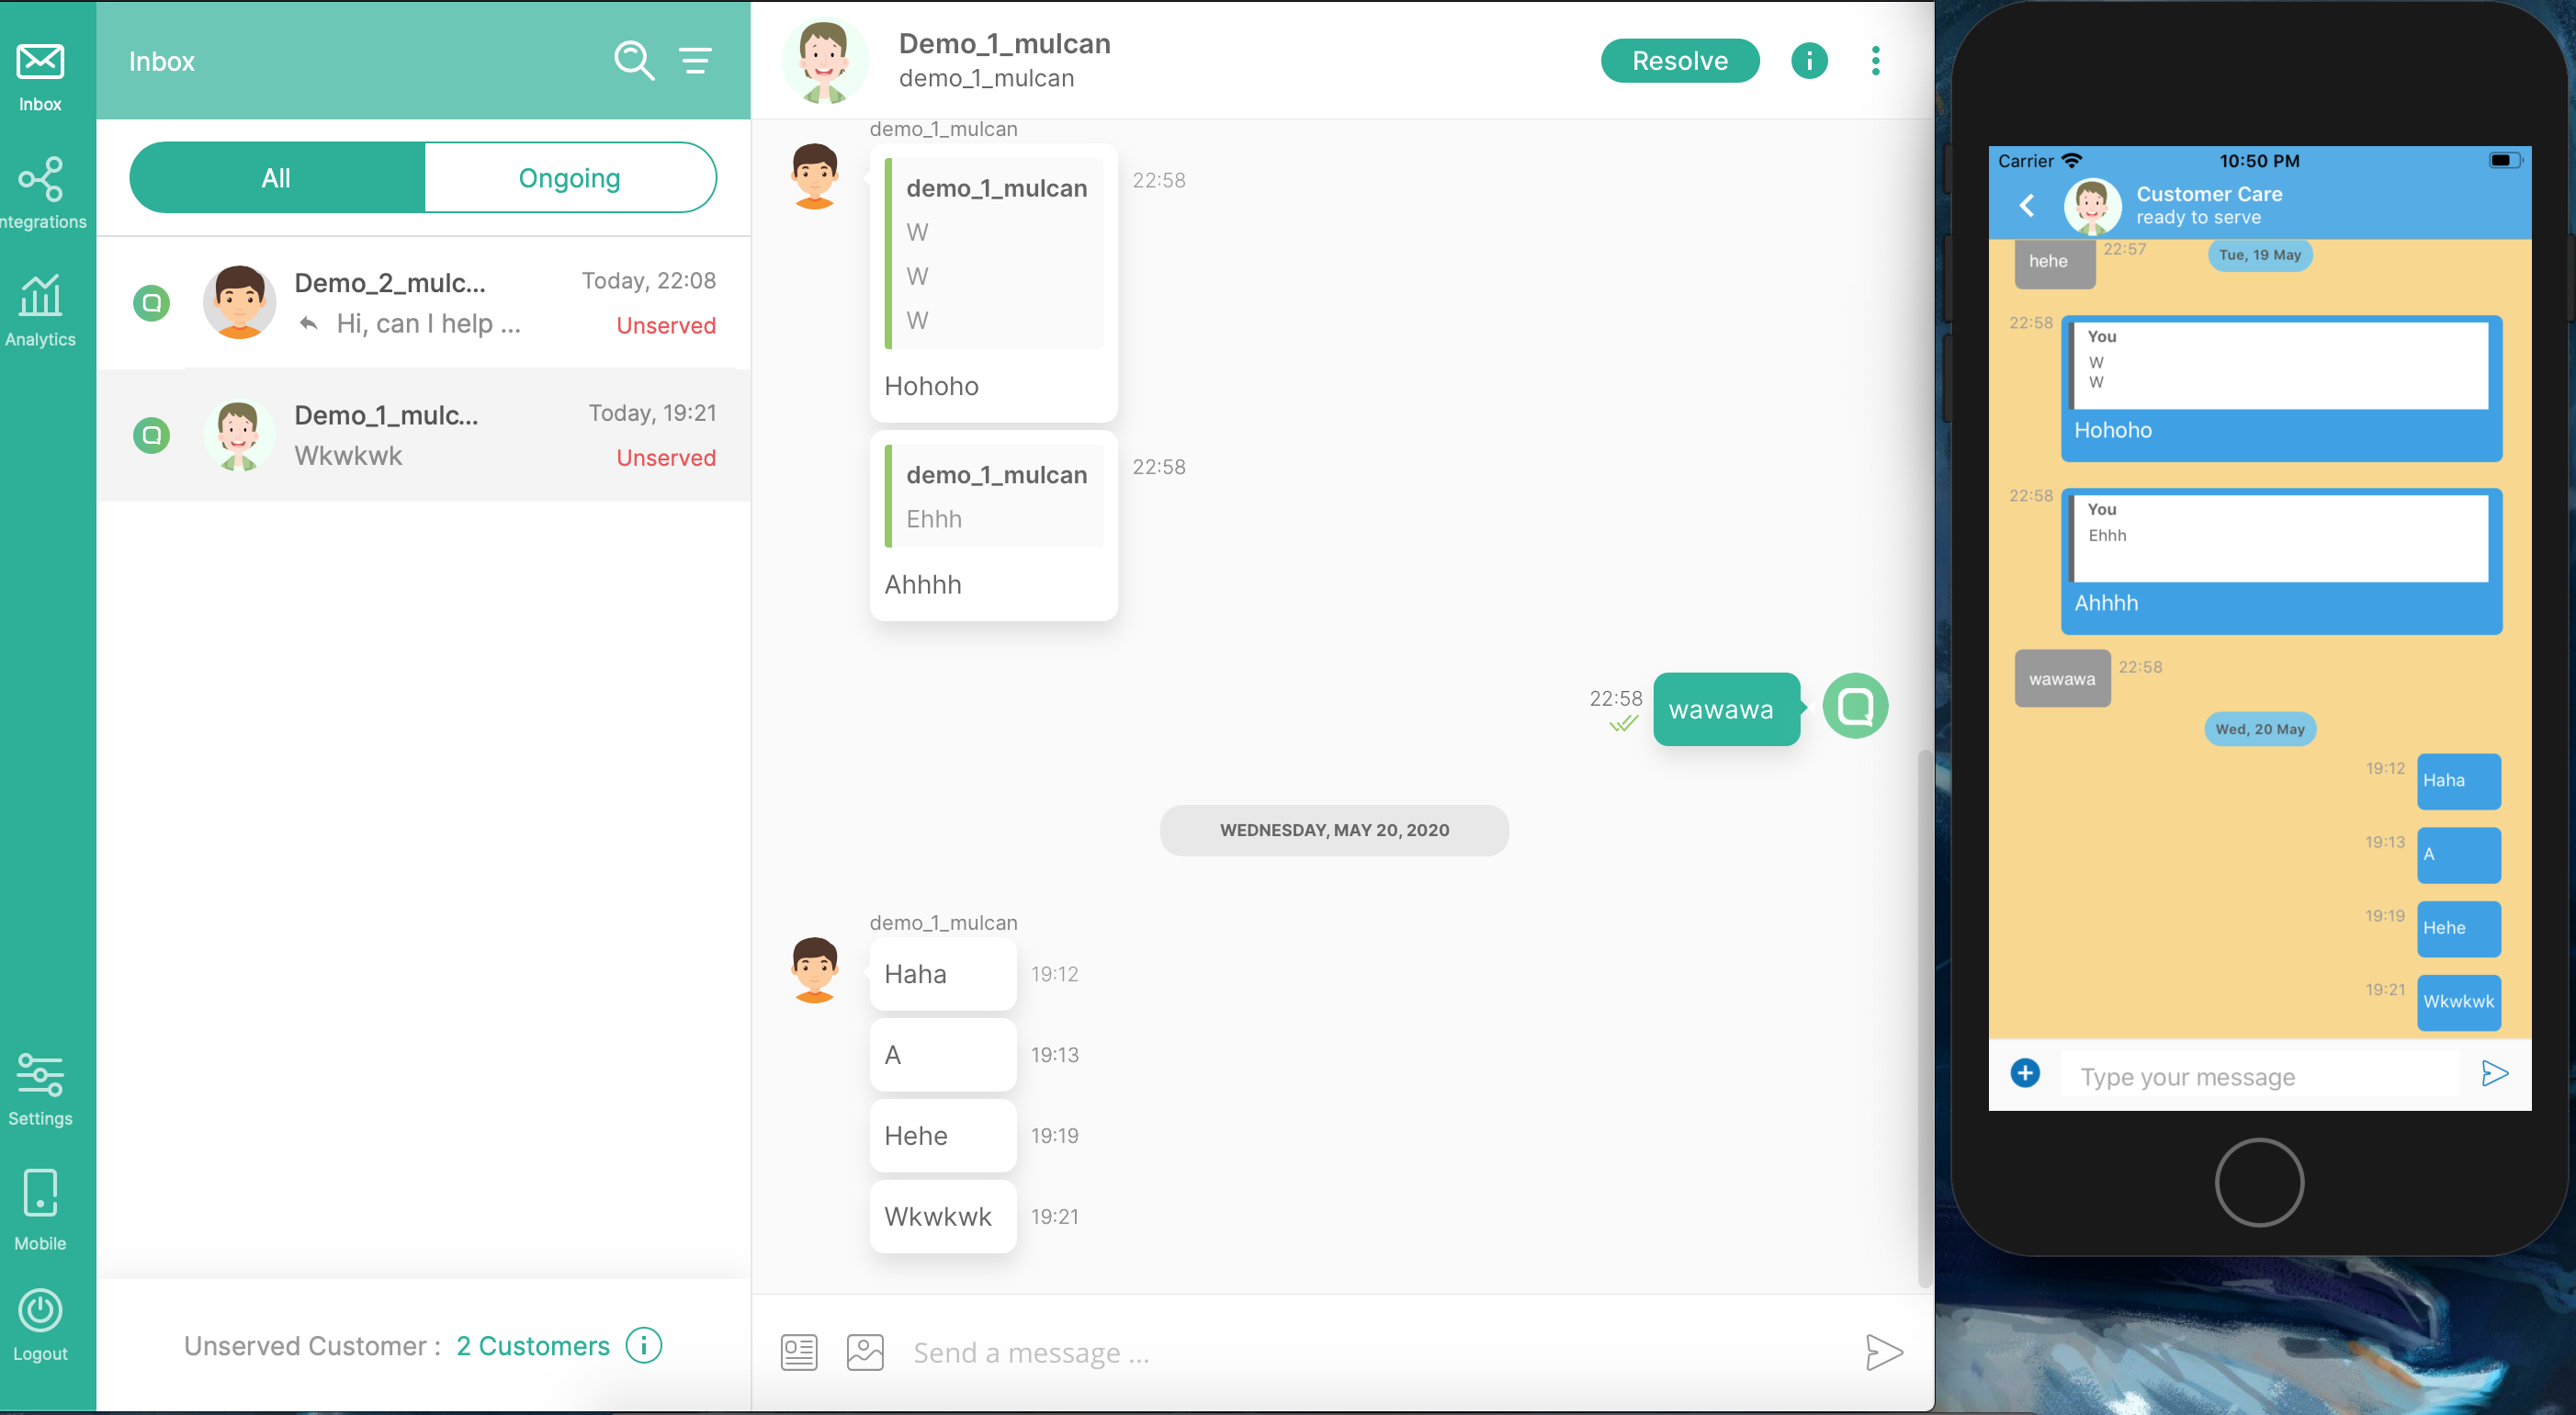
Step 5: Start Chatting
The Example is ready to use. You can start chatting with your customer service.
Contribution
ios-multichannel-widget is fully open-source. All contributions and suggestions are welcome!
GitHub
| link |
| Stars: 0 |
| Last commit: 49 weeks ago |
Dependencies
Release Notes
bbg release fase 2
Swiftpack is being maintained by Petr Pavlik | @ptrpavlik | @swiftpackco | API | Analytics