Swiftpack.co - Swift Packages by MihaelIsaev

Swiftpack.co is a collection of thousands of indexed Swift packages. Search packages.

Packages published by MihaelIsaev

MihaelIsaev/UIKitPlus 2.1.4
๐Ÿฐ Declarative UIKit with LivePreview for iOS9+ (best alternative to SwiftUI)
โญ๏ธ 592
๐Ÿ•“ 16 weeks ago
๐Ÿ”– Release Notes

Releases

The markdown parsing is broken/disabled for release notes. Sorry about that, I'm chasing the source of a crash that's been bringing this website down for the last couple of days.
๐ŸŽ‰Release 2.0.0
2 years ago
All the changes are visible in the readme, new project template, and in updated examples! Enjoy! ๐Ÿš€
Relative constraints with tags ๐Ÿ”ฅ
4 years ago
<p align="center"> <img width="375" alt="Screenshot 2020-04-18 at 05 47 57" src="https://user-images.githubusercontent.com/1272610/79625178-2bba4200-8138-11ea-959b-f7487a45cee5.png"> </p> Really often we have to create some views with constraints related to each other ๐Ÿ˜ƒ ## Before Before that release we had to create a variable with view somewhere outside, like this ```swift let someView = UView() ``` then we used it with other views to make relative constraints ```swift UView { someView.size(200).background(.red).centerInSuperview() UView().size(100).background(.cyan).centerXInSuperview().top(to: someView) UView().size(100).background(.purple).centerXInSuperview().bottom(to: someView) UView().size(100).background(.yellow).centerYInSuperview().right(to: someView) UView().size(100).background(.green).centerYInSuperview().left(to: someView) } ``` ## Now But since now we can easily rely just to view's tag ```swift UView { UView().size(200).background(.red).centerInSuperview().tag(7) UView().size(100).background(.cyan).centerXInSuperview().top(to: 7) UView().size(100).background(.purple).centerXInSuperview().bottom(to: 7) UView().size(100).background(.yellow).centerYInSuperview().right(to: 7) UView().size(100).background(.green).centerYInSuperview().left(to: 7) } ``` Even order doesn't matter ๐Ÿค— ```swift UView { UView().size(100).background(.cyan).centerXInSuperview().top(to: 7) UView().size(100).background(.purple).centerXInSuperview().bottom(to: 7) UView().size(100).background(.yellow).centerYInSuperview().right(to: 7) UView().size(100).background(.green).centerYInSuperview().left(to: 7) UView().size(200).background(.red).centerInSuperview().tag(7) } ``` You even can add view later and all related views will immediately stick to it once it's added ๐Ÿš€ ```swift let v = UView { UView().size(100).background(.cyan).centerXInSuperview().top(to: 7) UView().size(100).background(.purple).centerXInSuperview().bottom(to: 7) UView().size(100).background(.yellow).centerYInSuperview().right(to: 7) UView().size(100).background(.green).centerYInSuperview().left(to: 7) } DispatchQueue.main.asyncAfter(deadline: .now() + 5) { UIView.animate(withDuration: 1) { v.body { UView().size(200).background(.red).centerInSuperview().tag(7) } } } ```
Gestures ๐ŸŽ‰
4 years ago
## Tested, Fixed and Improved all the gestures We support all available gestures ### TapGestureRecognizer ```swift TapGestureRecognizer(taps: 1, touches: 1) ``` or ```swift TapGestureRecognizer() .numberOfTapsRequired(1) .numberOfTouchesRequired(1) ``` > ๐Ÿ’ก`numberOfTapsRequired` and `numberOfTouchesRequired` also accept `@State` also you can conveniently call `onTapGesture` at any view ```swift .onTapGesture {} .onTapGesture { view in } .onTapGesture { view, state in } .onTapGesture { view, state, recognizer in } .onTapGesture(taps: 1, touches: 1) { view, state in } .onTapGesture(taps: 1, touches: 1) { view, state, recognizer in } .onTapGesture(taps: 1, touches: 1, $someState) .onTapGesture(taps: 1, touches: 1, on: .ended) { } .onTapGesture(taps: 1, touches: 1, on: .ended) { view in } ``` ### LongPressGestureRecognizer ```swift LongPressGestureRecognizer(taps: 0, touches: 1, minDuration: nil, allowableMovement: nil) ``` or ```swift LongPressGestureRecognizer(taps: 0, touches: 1) .minimumPressDuration(500) .allowableMovement(10) ``` > ๐Ÿ’ก`minimumPressDuration ` and `allowableMovement ` also accept `@State` also you can conveniently call `onLongPressGesture ` at any view ```swift .onLongPressGesture { view in } .onLongPressGesture { view, state in } .onLongPressGesture { view, state, recognizer in } .onLongPressGesture(taps: 1, touches: 1) { view, state in } .onLongPressGesture(taps: 1, touches: 1) { view, state, recognizer in } .onLongPressGesture(taps: 1, touches: 1, $someState) .onLongPressGesture(taps: 1, touches: 1, on: .ended) { } .onLongPressGesture(taps: 1, touches: 1, on: .ended) { view in } ``` ### PinchGestureRecognizer ```swift PinchGestureRecognizer(scale: 10) ``` or ```swift PinchGestureRecognizer().scale(10) ``` > ๐Ÿ’ก`scale ` also accept `@State` also you can conveniently call `onPinchGesture` at any view ```swift // there are a lot of convenient combinations of this method .onPinchGesture { view, state, recognizer in print("changed scale: \(recognizer.scale) velocity: \(recognizer.velocity)") view.size(200 * r.scale) } ``` ### RotationGestureRecognizer ```swift RotationGestureRecognizer(rotation: 2) ``` or ```swift RotationGestureRecognizer().rotation(2) ``` > ๐Ÿ’ก`rotation ` also accept `@State` also you can conveniently call `onRotationGesture` at any view ```swift // there are a lot of convenient combinations of this method .onRotationGesture { view, state, recognizer in if state == .changed { view.transform = CGAffineTransform(rotationAngle: recognizer.rotation) } } ``` ### SwipeGestureRecognizer ```swift SwipeGestureRecognizer(direction: .left, touches: nil) ``` or ```swift SwipeGestureRecognizer(direction: .left) .numberOfTouchesRequired(1) ``` > ๐Ÿ’ก`numberOfTouchesRequired ` also accept `@State` also you can conveniently call `onSwipeGesture` at any view ```swift // there are a lot of convenient combinations of this method .onSwipeGesture(direction: .left) { view, state, recognizer in } ``` ### PanGestureRecognizer ```swift PanGestureRecognizer(minTouches: 1, maxTouches: 2) ``` or ```swift PanGestureRecognizer() .minimumNumberOfTouches(1) .maximumNumberOfTouches(1) ``` > ๐Ÿ’ก`minimumNumberOfTouches ` and `maximumNumberOfTouches ` also accept `@State` also you can conveniently call `onPanGesture` at any view ```swift // there are a lot of convenient combinations of this method .onPanGesture { view, state, recognizer in } ``` ### ScreenEdgePanGestureRecognizer ```swift ScreenEdgePanGestureRecognizer(edges: .all) ``` and additional `.edges` method gives you an ability to change edges property later ```swift .edges(.left) ``` > ๐Ÿ’ก`edges` also accept `@State` also you can conveniently call `onScreenEdgePanGesture` at any view ```swift // there are a lot of convenient combinations of this method .onScreenEdgePanGesture(edges: .left) { view, state, recognizer in } ``` ### HoverGestureRecognizer ```swift HoverGestureRecognizer() ``` you can conveniently call `onHoverGesture` or `hovered` at any view ```swift .hovered { print("hovered: \($0)") } ``` or ```swift .onHoverGesture { view, state, recognizer in switch state { case .began: print("began") view.backgroundColor = .magenta case .changed: print("changed") view.backgroundColor = .orange case .ended: print("ended") view.backgroundColor = .green default: print("default") } } ``` ### State tracking Any gesture recognizer has tracking methods There are universal `trackState` method which contains `state` and optionally `recognizer` ```swift .trackState { state, recognizer in // do switch/case here } ``` > ๐Ÿ’ก`trackState` can accept `@State` And additionally you have an ability to listen for exact state easily ๐Ÿ‘ ```swift .onPossible { recognizer in } .onBegan { recognizer in } .onChanged { recognizer in } .onEnded { recognizer in } .onCancelled { recognizer in } .onFailed { recognizer in } ``` > ๐Ÿ’ก`recognizer` is optional ### Delegate Any gesture recognizer has its delegate methods available directly You can set delegate simply like this ```swift .delegate(...) ``` Additionally you can use these convenient methods below and even combine them with the classic delegate ```swift .shouldBegin { recognizer in return true } .shouldReceivePress { recognizer, press in return true } .shouldReceiveTouch { recognizer, touch in return true } .shouldRequireFailureOfOtherGestureRecognizer { currentRecognizer, otherRecognizer in return false } .shouldBeRequiredToFailByOtherGestureRecognizer { currentRecognizer, otherRecognizer in return false } .shouldRecognizeSimultaneouslyWithOtherGestureRecognizer { currentRecognizer, otherRecognizer in return true } ``` ### How to add a gesture to view ```swift UView().gesture(myGesture) ``` or ```swift UView().gestures(myGesture1, myGesture2) ``` or even ```swift UView().gestures { myGesture1 myGesture2 // unlimited amount } ``` ### Multiple gestures at the same time (simple example for pinch + rotate) ```swift UView().size(200).background(.red).centerInSuperview().gestures { v in PinchGestureRecognizer().shouldRecognizeSimultaneouslyWithOtherGestureRecognizer { og in print("PinchGestureRecognizer shouldRecognizeSimultaneouslyWith: \(og.tag)") return true }.trackState { s, r in if s == .changed { v.size(200 * r.scale) } }.tag(3) RotationGestureRecognizer().shouldRecognizeSimultaneouslyWithOtherGestureRecognizer { og in print("PinchGestureRecognizer shouldRecognizeSimultaneouslyWith: \(og.tag)") return true }.trackState { s, r in if s == .changed { v.transform = CGAffineTransform(rotationAngle: r.rotation) } }.tag(4) } ``` ### View's touch methods which available without gesture recognizers ```swift .touchesBegan { view, touch, event in } .touchesMoved { view, touch, event in } .touchesEnded { view, touch, event in } .touchesCancelled { view, touch, event in } ``` > ๐Ÿ’ก All the methods above has its convenient shorter variations
Declarative ViewController
4 years ago
Sometimes you may need to declare view controller quickly without creating a separate file for it ```swift ViewController { UView() UView() UView() // add any amount of subviews } .background(.gray) .statusBarStyle(.dark) .title("Hello world") .navigationController { nav in } .navigationItem { navItem in } .onViewDidLoad { vc in } .onViewDidLayoutSubviews { vc in } .onViewWillAppear { vc, animated in } .onViewWillAppearFirstTime { vc, animated in } .onViewDidAppear { vc, animated in } .onViewDidAppearFirstTime { vc, animated in } .onViewWillDisappear { vc, animated in } .onViewDidDisappear { vc, animated in } .touchesBegan { vc, touches, event in } .touchesMoved { vc, touches, event in } .touchesCancelled { vc, touches, event in } .touchesEnded { vc, touches, event in } ```
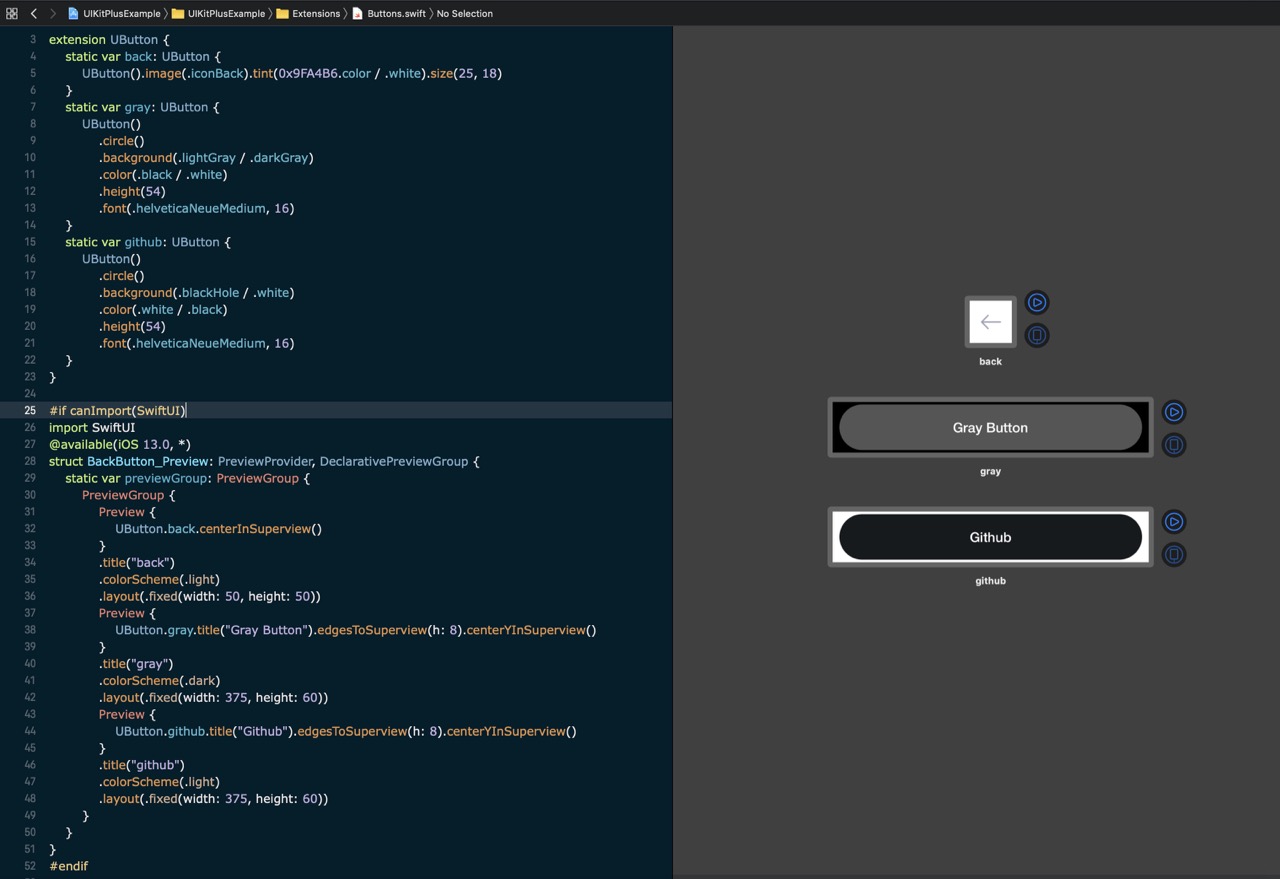
Preview group ๐Ÿ”ฅ
4 years ago
It is convenient way to create multiple previews inside one struct Limitations: - only 10 previews inside group - `rtl` and `language` properties can be set only to group, not to previews directly ```swift #if canImport(SwiftUI) import SwiftUI @available(iOS 13.0, *) struct MyPreviewGroup_Preview: PreviewProvider, DeclarativePreviewGroup { static var previewGroup: PreviewGroup { PreviewGroup { // 1 to 10 previews inside Preview { MainViewController() } .colorScheme(.dark) .device(.iPhoneX) Preview { MainViewController() } .colorScheme(.light) .device(.iPhoneX) Preview { // in this group title will be shown in `fr` language UButton(String(.en("Hello"), .fr("Bonjour"), .ru("ะŸั€ะธะฒะตั‚"))) .circle() .background(.blackHole / .white) .color(.white / .black) .height(54) .edgesToSuperview(h: 8) .centerYInSuperview() } .colorScheme(.dark) .layout(.fixed(width: 300, height: 64)) } .language(.fr) // limited to group .rtl(true) // limited to group } } #endif ``` ![photo_2020-04-08 19 54 32](https://user-images.githubusercontent.com/1272610/78805696-c85f4000-79d2-11ea-9be3-8f430ab40ad0.jpeg)
Ready to beat SwiftUI
4 years ago
Hurray, I made UIKitPlus even more powerful than before! It is updated to Swift 5.2 and Xcode 11.4! #### For those who doesn't know what is `UIKitPlus` > It is complex production-ready solution for easy building amazing UI on UIKit. This is a UIKit-wrapper which makes is declarative, allows to add subviews in SwiftUI style, and gives the most beautiful way to declare constraints! So no more need in `SnapKit ` or its clones! Even more, constraints may be set in advance anywhere, so before you add view to superview! ๐Ÿš€ You can start using it today even for one or two views. Just try it and you will never want to go back! ๐Ÿคท I refactored and updated [EXAMPLE PROJECT](https://github.com/MihaelIsaev/UIKitPlusExample) so now **LivePreview** works in every file just like in SwiftUI! In the [library's readme](https://github.com/MihaelIsaev/UIKitPlus) you will find detailed examples for everything, bu here I want to highlight some awesome bonus features: - easily declare dynamic colors for dark/light modes ```swift let titleColor: UIColor = .black / .white // second color is for dark mode (works automatically ofc) ``` - root view controller This view controller you could use as enter point to the app and inside it declare routes to other view controllers and its transitions. It gives an ability to easily switch between controllers and support deep links. Documentation [is here](https://github.com/MihaelIsaev/UIKitPlus/blob/master/Readme/RootViewController.md) - localize your strings easily ```swift String(.en("Hello"), .fr("Bonjour"), .ru("ะŸั€ะธะฒะตั‚"), .es("Hola"), .zh_Hans("ไฝ ๅฅฝ"), .ja("ใ“ใ‚“ใซใกใฏ")) ``` - build attributed strings easily ```swift "Hello".foreground(.darkGrey).font(.articoRegular, 15) ``` - and even concatenate them easily ```swift "Hello ".foreground(.green).font(.articoRegular, 15) + "world".foreground(.red).font(.articoRegular, 15) ``` - format textfields easily! example with [AnyFormatKit](https://github.com/luximetr/AnyFormatKit) lib ```swift static var phone: TextField { TextField() .content(.telephoneNumber) .autocapitalization(.none) .autocorrection(.no) .keyboard(.phonePad) .font(.articoRegular, 15) .placeholder("(555) 123-4567".foreground(.darkGrey).font(.articoRegular, 15)) .color(.blackHole) .height(18) .formatCharacters { textView, range, text in // here we use `AnyFormatKit` let phoneFormatter = DefaultTextInputFormatter(textPattern: "(###) ###-####") let result = phoneFormatter.formatInput(currentText: textView.text ?? "", range: range, replacementString: text) textView.text = result.formattedText } } ``` and even more cool, beautiful and convenience features โค๏ธ because I'm writing this lib for myself and just would love to share it with you ๐Ÿ˜ƒ If you will use it please don't hesitate to ask me any questions! I'm ready to help with anything! You have a lot of ways to get help: - file an issue here - write me in Discord directly to `iMike#3049` - write me in Discord in #ios channel on [Vapor Discord server](https://discordapp.com/invite/vapor) - write me in Discord in #uikitplus channel in [Swift Stream Discord server](https://discord.gg/q5wCPYv)
Implement TextView
4 years ago
```swift @State var text = "" TextView($text) .tag(0) .background(.purple) .color(.white) .tint(.red) .placeholder("Placeholder title") .corners(4) .inputAccessoryView { SomeAccessoryView() } .height(88) ```
Implement VSpace, HSpace, Space
4 years ago
```swift VStack { View1() VSpace(16) // adds 16pt empty view View2() } ``` ```swift HStack { View1() HSpace(16) // adds 16pt empty view View2() } ``` ```swift HStack { View1().width(100) View2().width(32) Space() // adds flexible empty view } ```
Brand new VScrollStack and HScrollStack โค๏ธ
4 years ago
Use `VScrollStack` and `HScrollStack` as simple as `VStack` and `HStack` but with scrolling! It contains methods from both `StackView` and `ScrollView`. ```swift body { VScrollStack { Text("Text on top") View().height(400).color(.red) Text("Text 400px from top") View().height(400).color(.cyan) Text("Text ~800px from top") View().height(400).color(.purple) Text("Text at the bottom") } .edgesToSuperview() .spacing(16) // stackview method .hideAllIndicators() // scrollview method } ```
New portion of useful things and fixes
4 years ago
- DeclarativeProtocol: implement `tag` method - Image: implement more `url` methods - PickerView: implement `textColor` methods - Button: fix reactive title logic - TextField: implement `shouldReturnToNextResponder` - ViewController: improve keyboard notification handlers by retrieving animation curve info to flawlessly show/hide keyboard with $keyboardHeight
iOS macOS tvOS
MihaelIsaev/FluentQuery 0.4.32
๐Ÿ—ƒ Powerful and easy to use Swift Query Builder for Vapor 3.
โญ๏ธ 148
๐Ÿ•“ 4 years ago
MihaelIsaev/FCM 2.13.0
โšก๏ธ PushNotifications through FireBase for Vapor 3 and 4.
โญ๏ธ 120
๐Ÿ•“ 6 weeks ago
๐Ÿ”– Release Notes

Releases

The markdown parsing is broken/disabled for release notes. Sorry about that, I'm chasing the source of a crash that's been bringing this website down for the last couple of days.
Add method to retrieve subscribed topics
6 weeks ago
Thanks to @chinh-tran
Add image for the push notifications
6 weeks ago
`FCMApnsConfig` initializer now have optional `FCMOptions` argument which could be used to attach image to the push notification. Thanks to @paunik
Fix memory issues (#26) by @grahamburgsma
3 years ago
* Use Vapor client instead to get helpers and reduce lower level work * Update all other uses of client * Generalize response error handling
Implement one more convenient initialization
3 years ago
```swift app.fcm.configuration = .envServiceAccountKeyFields ``` it will initialize FCM by reading the following environment variables ``` FCM_EMAIL - `client_email` in service.json FCM_PROJECT_ID - `project_id` in service.json FCM_PRIVATE_KEY - `private_key` in service.json ```
โ˜„๏ธ Implement batch sending
3 years ago
```swift // get it from iOS/Android SDK let token1 = "<YOUR FIREBASE DEVICE TOKEN>" let token2 = "<YOUR FIREBASE DEVICE TOKEN>" let token3 = "<YOUR FIREBASE DEVICE TOKEN>" ... let token100500 = "<YOUR FIREBASE DEVICE TOKEN>" let notification = FCMNotification(title: "Life is great! ๐Ÿ˜ƒ", body: "Swift one love! โค๏ธ") let message = FCMMessage(notification: notification) application.fcm.batchSend(message, tokens: [token1, token2, token3, ..., token100500]).map { print("sent!") } ```
๐Ÿ”ฅ Implement pure APNS to Firebase token converter
3 years ago
Now you can throw away Firebase libs from dependencies of your iOS apps because you can send pure APNS tokens to your server and it will register it in Firebase by itself. It is must have for developers who don't want to add Firebase libs into their apps, and especially for iOS projects who use Swift Package Manager cause Firebase doesn't have SPM support for its libs yet. ## How to use ### Preparation 1. Go to [Firebase Console](https://console.firebase.google.com/) -> Project Settings -> Cloud Messaging tab 2. Copy `Server Key` from `Project Credentials` area Next steps are optional 3. Put server key into environment variables as `FCM_SERVER_KEY=<YOUR_SERVER_KEY>` 4. Put your app bundle identifier into environment variables as `FCM_APP_BUNDLE_ID=<APP_BUNDLE_ID>` ### Tokens registration ```swift /// The simplest way /// .env here means that FCM_SERVER_KEY and FCM_APP_BUNDLE_ID will be used application.fcm.registerAPNS(.env, tokens: "token1", "token3", ..., "token100").flatMap { tokens in /// `tokens` is array of `APNSToFirebaseToken` structs /// which contains: /// registration_token - Firebase token /// apns_token - APNS token /// isRegistered - boolean value which indicates if registration was successful } /// instead of .env you could declare your own identifier extension RegisterAPNSID { static var myApp: RegisterAPNSID { .init(appBundleId: "com.myapp") } } /// Advanced way application.fcm.registerAPNS( appBundleId: String, // iOS app bundle identifier serverKey: String?, // optional server key, if nil then env variable will be used sandbox: Bool, // optional sandbox key, false by default tokens: [String], // an array of APNS tokens on: EventLoop? // optional event loop, if nil then application.eventLoopGroup.next() will be used ).flatMap { tokens in /// the same as in above example } ```
Fix annoying moments
4 years ago
- fix annoying warning: cannot modify client configuration after client has been used - add `send` method with eventLoop argument to avoid manual `hop(to:)` call so now if you send from Request you could write ```swift req.fcm.send(message, on: req.eventLoop) ``` instead of ```swift req.fcm.send(message).hop(to: req.eventLoop) ```
New properties for `FCMAndroidNotification` (#18)
4 years ago
Thanks to @nerzh โค๏ธ
Vapor 4 ๐Ÿš€
4 years ago
Please read the readme to get all the details
New properties for `FCMAndroidNotification` (#18)
4 years ago
Thanks to @nerzh โค๏ธ
macOS
MihaelIsaev/VaporCron 2.6.0
โฒ Swift cron scheduler for Vapor
โญ๏ธ 85
๐Ÿ•“ 1 year ago
๐Ÿ”– Release Notes

Releases

The markdown parsing is broken/disabled for release notes. Sorry about that, I'm chasing the source of a crash that's been bringing this website down for the last couple of days.
Seconds support
1 year ago
Seconds are optional, just use 6 symbols mask to launch in seconds mode ```swift import VaporCron let job = try app.cron.schedule("* * * * * *") { // every second print("Closure fired") } ``` The rest is the same as before
Upgrade to Vapor 4 ๐Ÿš€
4 years ago
Please read all the details in updated readme โค๏ธ
Please welcome cron for Vapor! ๐Ÿ‘
5 years ago
[![Mihael Isaev](https://user-images.githubusercontent.com/1272610/53996790-3f346480-4153-11e9-9ca8-216680b4ab19.png)](http://mihaelisaev.com) <p align="center"> <a href="LICENSE"> <img src="https://img.shields.io/badge/license-MIT-brightgreen.svg" alt="MIT License"> </a> <a href="https://swift.org"> <img src="https://img.shields.io/badge/swift-4.2-brightgreen.svg" alt="Swift 4.2"> </a> </p> <br> #### Support this lib by giving a โญ๏ธ ## How to install ### Swift Package Manager ```swift .package(url: "https://github.com/MihaelIsaev/VaporCron.git", from:"1.0.0") ``` In your target's dependencies add `"VaporCron"` e.g. like this: ```swift .target(name: "App", dependencies: ["VaporCron"]), ``` ## Usage ### Simple job with closure ```swift import VaporCron let job = try? VaporCron.schedule("* * * * *", on: eventLoop) { print("Closure fired") } ``` ### Complex job in dedicated struct ```swift import VaporCron /// Your job should conform to `VaporCronSchedulable` struct ComplexJob: VaporCronSchedulable { static var expression: String { return "*/2 * * * *" } static func task(on container: VaporCronContainer) -> Future<Void> { // Void is not a requirement, you may return any type return eventLoop.newSucceededFuture(result: ()).always { print("ComplexJob fired") } } } let complexJob = try? VaporCron.schedule(ComplexJob.self, on: app) ``` Scheduled job may be cancelled just by calling `.cancel()` ## Where to define #### On boot You could define all cron jobs in your `boot.swift` cause here is `app: Application` which contains `eventLoop` ```swift import Vapor import VaporCron /// Called after your application has initialized. public func boot(_ app: Application) throws { let complexJob = try? VaporCron.schedule(ComplexJob.self, on: app) /// This example code will cancel scheduled job after 185 seconds /// so in a console you'll see "Closure fired" three times only app.eventLoop.scheduleTask(in: .seconds(185)) { complexJob?.cancel() } } ``` #### In request handler Some jobs you may want to schedule from some request handler like this ```swift import Vapor import VaporCron func myEndpoint(_ req: Request) throws -> Future<HTTPStatus> { try VaporCron.schedule(ComplexJob.self, on: req) return .ok } ``` ### How to do something in the database every 5 minutes? ```swift import Vapor import VaporCron struct Every5MinJob: VaporCronSchedulable { static var expression: String { return "*/5 * * * *" } // every 5 minutes static func task(on container: VaporCronContainer) -> Future<Void> { // this is how you could get a connection to the database return container.requestPooledConnection(to: .psql).flatMap { conn in // here you sould do whatever you want cause you already have a connection to database // it's just an example below return User.query(on: conn).all().flatMap { users in return users.map { user in user.updatedAt = Date() return user.save(on: conn).transform(to: Void.self) }.flatten(on: container) } }.always { // this is how to close taken pooled connection try? container.releasePooledConnection(conn, to: .psql) } } } ``` ## Dependencies - [NIOCronScheduler](https://github.com/MihaelIsaev/NIOCronScheduler) - [SwifCron](https://github.com/MihaelIsaev/SwifCron) ## Contributing Please feel free to contribute!
macOS
MihaelIsaev/AwesomeWS 2.4.3
๐Ÿฌ An elegant way to use websockets with Vapor
โญ๏ธ 42
๐Ÿ•“ 2 years ago
๐Ÿ”– Release Notes

Releases

The markdown parsing is broken/disabled for release notes. Sorry about that, I'm chasing the source of a crash that's been bringing this website down for the last couple of days.
๐ŸŽ Implement `knownEventLoop` to fix race condition
2 years ago
There was race condition on mutation operations e.g. adding or removing channels which causes `fatalError` randomly on highload. Now it is fixed by calling any mutation operations on known `eventLoop`. **BREAKING CHANGES** now `subscribe` and `unsubscribe` methods ends with on `eventLoop: EventLoop)`
BaseObserver: `clients` variable fix.
4 years ago
Now broadcast works as expected.
2.0 for Vapor 4 ๐Ÿš€
4 years ago
[![Mihael Isaev](https://user-images.githubusercontent.com/1272610/72756525-ee045680-3be6-11ea-8a15-49414a453f8f.png)](http://mihaelisaev.com) <p align="center"> <a href="https://swift.org"> <img src="https://img.shields.io/badge/swift-5.1-brightgreen.svg" alt="Swift 5.1"> </a> </p> <br> Receive & send websocket messages through convenient observers. Even multiple observers on different endpoints! > ๐Ÿ’กTypes of observers: Classic, Declarative, Bindable. Read about all of them below. Built for Vapor4. ### How it works ? ### Declarative observer WS lib have `.default` WSID which represents `DeclarativeObserver`. > ๐Ÿ’กYou can declare your own WSID with another type of observer and your custom class. You can start working with it this easy way ```swift app.ws.build(.default).serve() ``` In this case it will start listening for websocket connections at `/`, but you can change it before you call `.serve()` ```swift app.ws.build(.default).at("ws").serve() ``` Ok now it is listening at `/ws` Also you can protect your websocket endpoint with middlewares, e.g. you can check auth before connection will be established. ```swift app.ws.build(.default).at("ws").middlewares(AuthMiddleware()).serve() ``` Ok, looks good, but how to handle incoming data? As we use `.default` WSID which represents `Declarative` observer we can handle incoming data like this ```swift app.ws.build(.default).at("ws").middlewares(AuthMiddleware()).serve().onOpen { client in print("client just connected \(client.id)") }.onText { client, text in print("client \(client.id) text: \(text)") } ``` there are also available: `onClose`, `onPing`, `onPong`, `onBinary`, `onByteBuffer` handlers. > ๐Ÿ’กSet `app.logger.logLevel = .info` or `app.logger.logLevel = .debug` to see more info about connections ### Classic observer You should create new class which inherit from `ClassicObserver` ```swift import WS class MyClassicWebSocket: ClassicObserver { override func on(open client: AnyClient) {} override func on(close client: AnyClient) {} override func on(text: String, client: AnyClient) {} /// also you can override: `on(ping:)`, `on(pong:)`, `on(binary:)`, `on(byteBuffer:)` } ``` and you must declare a WSID for it ```swift extension WSID { static var myClassic: WSID<MyClassicWebSocket> { .init() } } ``` so then start serving it ```swift app.ws.build(.myClassic).at("ws").serve() ``` ### Bindable observer This kind of observer designed to send and receive events in special format, e.g. in JSON: ```json { "event": "<event name>", "payload": <anything> } ``` or just ```json { "event": "<event name>" } ``` > ๐Ÿ’กBy default lib uses `JSONEncoder` and `JSONDecoder`, but you can replace them with anything else in `setup` method. First of all declare any possible events in `EID` extension like this ```swift struct Hello: Codable { let firstName, lastName: String } struct Bye: Codable { let firstName, lastName: String } extension EID { static var hello: EID<Hello> { .init("hello") } static var bye: EID<Bye> { .init("bye") } // Use `EID<Nothing>` if you don't want any payload } ``` Then create your custom bindable observer class ```swift class MyBindableWebsocket: BindableObserver { // register all EIDs here override func setup() { bind(.hello, hello) bind(.bye, bye) // optionally setup here custom encoder/decoder encoder = JSONEncoder() // e.g. with custom `dateEncodingStrategy` decoder = JSONDecoder() // e.g. with custom `dateDecodingStrategy` } // hello EID handler func hello(client: AnyClient, payload: Hello) { print("Hello \(payload.firstName) \(payload.lastName)") } // bye EID handler func bye(client: AnyClient, payload: Bye) { print("Bye \(payload.firstName) \(payload.lastName)") } } ``` declare a WSID ```swift extension WSID { static var myBindable: WSID<MyBindableWebsocket> { .init() } } ``` then start serving it ```swift app.ws.build(.myBindable).at("ws").serve() ``` > ๐Ÿ’กHere you also could provide custom encoder/decoder > e,g, `app.ws.build(.myBindable).at("ws").encoder(JSONEncoder()).encoder(JSONDecoder()).serve()` ### How to send data Data sending works through `Sendable` protocol, which have several methods ```swift .send(text: <StringProtocol>) // send message with text .send(bytes: <[UInt8]>) // send message with bytes .send(data: <Data>) // send message with binary data .send(model: <Encodable>) // send message with Encodable model .send(model: <Encodable>, encoder: Encoder) .send(event: <EID>) // send bindable event .send(event: <EID>, payload: T?) ``` > all these methods returns `EventLoopFuture<Void>` Using methods listed above you could send messages to one or multiple clients. #### To one client e.g. in `on(open:)` or `on(text:)` ```swift client.send(...) ``` #### To all clients ```swift client.broadcast.send(...) client.broadcast.exclude(client).send(...) // excluding himself req.ws(.mywsid).broadcast.send(...) ``` #### To clients in channels ```swift client.broadcast.channels("news", "updates").send(...) req.ws(.mywsid).broadcast.channels("news", "updates").send(...) ``` #### To custom filtered clients e.g. you want to find all ws connections of the current user to send a message to all his devices ```swift req.ws(.mywsid).broadcast.filter { client in req.headers[.authorization].first == client.originalRequest.headers[.authorization].first }.send(...) ``` ### Broadcast You could reach `broadcast` obejct on `app.ws.observer(.mywsid)` or `req.ws(.mywsid).broadcast` or `client.broadcast`. This object is a builder, so using it you should filter recipients like this `client.broadcast.one(...).two(...).three(...).send()` Available methods ```swift .encoder(Encoder) // set custom data encoder .exclude([AnyClient]) // exclude provided clients from clients .filter((AnyClient) -> Bool) // filter clients by closure result .channels([String]) // filter clients by provided channels .subscribe([String]) // subscribe filtered clients to channels .unsubscribe([String]) // unsubscribe filtered clients from channels .disconnect() // disconnect filtered clients .send(...) // send message to filtered clients .count // number of filtered clients ``` ### Channels #### Subscribe ```swift client.subscribe(to: ...) // will subscribe client to provided channels ``` To subscribe to `news` and `updates` call it like this `client.subscribe(to: "news", "updates")` #### Unsubscribe ```swift client.unsubscribe(from: ...) // will unsubscribe client from provided channels ``` #### List ```swift client.channels // will return a list of client channels ``` ### Defaults If you have only one observer in the app you can set it as default. It will give you ability to use it without providing its WSID all the time, so you will call just `req.ws()` instead of `req.ws(.mywsid)`. ```swift // configure.swift app.ws.setDefault(.myBindable) ``` Also you can set custom encoder/decoder for all the observers ```swift // configure.swift let encoder = JSONEncoder() encoder.dateEncodingStrategy = .secondsSince1970 app.ws.encoder = encoder let decoder = JSONDecoder() decoder.dateDecodingStrategy = .secondsSince1970 app.ws.decoder = decoder ``` ### Client As you may see in every handler you always have `client` object. This object conforms to `AnyClient` protocol which contains useful things inside **variables** - `id` - UUID - `originalRequest` - original `Request` - `eventLoop` - next `EventLoop` - `application` - pointer to `Application` - `channels` - an array of channels that client subscribed to - `logger` - pointer to `Logger` - `observer` - this client's observer - `sockets` - original socket connection of the client - `exchangeMode` - client's observer exchange mode **conformanses** - `Sendable` - so you can use `.send(...)` - `Subscribable` - so you can use `.subscribe(...)`, `.unsubscribe(...)` - `Disconnectable` - so you can call `.disconnect()` to disconnect that user Original request gives you ability to e.g. determine connected user: ```swift let user = try client.originalRequest.requireAuthenticated(User.self) ```
macOS
MihaelIsaev/wkhtmltopdf 1.1.1
๐Ÿ“– PDF render for Swift and Vapor 3.
โญ๏ธ 37
๐Ÿ•“ 3 years ago
MihaelIsaev/SwifCron 2.0.0
โฑSimple pure swift cron expression parser
โญ๏ธ 28
๐Ÿ•“ 2 years ago
๐Ÿ”– Release Notes

Releases

The markdown parsing is broken/disabled for release notes. Sorry about that, I'm chasing the source of a crash that's been bringing this website down for the last couple of days.
๐Ÿ•™ Add possibility to specify seconds
2 years ago
Now cron expression optionally could be written with seconds!
Please welcome the SwifCron little lib ๐Ÿ™‚
5 years ago
[![Mihael Isaev](https://user-images.githubusercontent.com/1272610/53910913-767d1580-406e-11e9-8ed6-f3025f193342.png)](http://mihaelisaev.com) <p align="center"> <a href="LICENSE"> <img src="https://img.shields.io/badge/license-MIT-brightgreen.svg" alt="MIT License"> </a> <a href="https://swift.org"> <img src="https://img.shields.io/badge/swift-4.2-brightgreen.svg" alt="Swift 4.2"> </a> <a href="https://cocoapods.org/pods/SwifCron"> <img src="https://img.shields.io/cocoapods/v/SwifCron.svg" alt="Cocoapod"> </a> </p> <br> ### Don't forget to support the lib by giving a โญ๏ธ ## How to install ### CocoaPods SwifCron is available through [CocoaPods](https://cocoapods.org) To install it, simply add the following line in your Podfile: ```ruby pod 'SwifCron', '~> 1.3.0' ``` ### Swift Package Manager ```swift .package(url: "https://github.com/MihaelIsaev/SwifCron.git", from:"1.3.0") ``` In your target's dependencies add `"SwifCron"` e.g. like this: ```swift .target(name: "App", dependencies: ["SwifCron"]), ``` ## Usage ```swift import SwifCron do { let cron = try SwifCron("* * * * *") //for getting next date related to current date let nextDate = try cron.next() //for getting next date related to custom date let nextDate = try cron.next(from: Date()) } catch { print(error) } ``` ## Limitations I use [CrontabGuru](https://crontab.guru/) as a reference So you could parse any expression which consists of digits with `*` `,` `/` and `-` symbols ## Contributing Please feel free to contribute! ## ToDo - write more tests - support literal names of months and days of week in expression - support non-standard digits like `7` for Sunday in day of week part of expression
MihaelIsaev/NIOCronScheduler 2.1.0
โŒš๏ธSwift cron scheduler based on Swift NIO (both v1 and v2)
โญ๏ธ 25
๐Ÿ•“ 1 year ago
๐Ÿ”– Release Notes

Releases

The markdown parsing is broken/disabled for release notes. Sorry about that, I'm chasing the source of a crash that's been bringing this website down for the last couple of days.
Seconds support
1 year ago
Seconds are optional, just use 6 symbols mask to launch in seconds mode ```swift let job = try? NIOCronScheduler.schedule("* * * * * *", on: eventLoop) { // every second print("Closure fired") } ``` The rest is the same as before
Upgrade to NIO2 ๐Ÿš€
4 years ago
Only NIO dependency version has been changed.
First release! ๐Ÿš€
5 years ago
[![Mihael Isaev](https://user-images.githubusercontent.com/1272610/53929077-f5da0b80-40a5-11e9-9992-d79cf212125e.png)](http://mihaelisaev.com) <p align="center"> <a href="LICENSE"> <img src="https://img.shields.io/badge/license-MIT-brightgreen.svg" alt="MIT License"> </a> <a href="https://swift.org"> <img src="https://img.shields.io/badge/swift-4.2-brightgreen.svg" alt="Swift 4.2"> </a> </p> <br> ### Don't forget to support the lib by giving a โญ๏ธ ## How to install ### Swift Package Manager ```swift .package(url: "https://github.com/MihaelIsaev/NIOCronScheduler.git", from:"1.0.0") ``` In your target's dependencies add `"NIOCronScheduler"` e.g. like this: ```swift .target(name: "App", dependencies: ["NIOCronScheduler"]), ``` ## Usage ```swift import NIOCronScheduler /// Simplest way is to use closure let job = try? NIOCronScheduler.schedule("* * * * *", on: eventLoop) { print("Closure fired") } /// Or create a struct that conforms to NIOCronSchedulable struct Job1: NIOCronSchedulable { static var expression: String { return "* * * * *" } static func task() { print("Job1 fired") } } let job1 = try? NIOCronScheduler.schedule(Job1.self, on: eventLoop) /// Or create a struct that conforms to NIOCronFutureSchedulable /// to be able to return a future struct Job2: NIOCronFutureSchedulable { static var expression: String { return "*/2 * * * *" } static func task(on eventLoop: EventLoop) -> EventLoopFuture<Void> { //Void is not a requirement, you may return any type return eventLoop.newSucceededFuture(result: ()).always { print("Job2 fired") } } } let job2 = try? NIOCronScheduler.schedule(Job2.self, on: eventLoop) ``` Scheduled job may be cancelled just by calling `.cancel()` on it #### For Vapor users The easiest way is to define all cron jobs in `boot.swift` cause here in `app: Application` container you could get `eventLoop`. So it may look like this ```swift import Vapor import NIOCronScheduler /// Called after your application has initialized. public func boot(_ app: Application) throws { let job = try? NIOCronScheduler.schedule("* * * * *", on: app.eventLoop) { print("Closure fired") } /// This example code will cancel scheduled job after 185 seconds /// so in a console you'll see "Closure fired" three times only app.eventLoop.scheduleTask(in: .seconds(185)) { job?.cancel() } } ``` Or sure you could schedule something from `req: Request` cause it have `eventLoop` inside itself as well. ## Limitations Cron expression parsing works through [SwifCron](https://github.com/MihaelIsaev/SwifCron) lib, please read it limitations and feel free to contribute into this lib as well ## Contributing Please feel free to contribute!
MihaelIsaev/Localizer 1.0.2
๐Ÿ‡ฎ๐Ÿ‡ธ๐Ÿ‡ฉ๐Ÿ‡ช๐Ÿ‡ฏ๐Ÿ‡ต๐Ÿ‡ฒ๐Ÿ‡ฝ Swift localization helper
โญ๏ธ 14
๐Ÿ•“ 3 years ago
MihaelIsaev/Vaporizer 1.0.0
โœˆ๏ธ Vapor 4 declarative wrapper
โญ๏ธ 8
๐Ÿ•“ 3 years ago
macOS
MihaelIsaev/braintree_swift 0.2.1
๐Ÿ’ฐNot official Swift Braintree provider for Vapor 3
โญ๏ธ 7
๐Ÿ•“ 11 weeks ago
๐Ÿ”– Release Notes

Releases

The markdown parsing is broken/disabled for release notes. Sorry about that, I'm chasing the source of a crash that's been bringing this website down for the last couple of days.
Fix `Package.swift`
4 years ago
4 years ago
MihaelIsaev/State 1.0.0
Swift @State
โญ๏ธ 7
๐Ÿ•“ 3 years ago
MihaelIsaev/branch.io.spm 0.32.0
Branch.io iOS SDK with SPM support (cleaned from `framework` files)
โญ๏ธ 4
๐Ÿ•“ 4 years ago
iOS macOS
MihaelIsaev/SwifQLNIO 2.2.0
Helper library for SwifQL and SwiftNIO
โญ๏ธ 2
๐Ÿ•“ 4 years ago
MihaelIsaev/Branch 2.0.0-beta.2.1.0
Branch.io API wrapper for Vapor4
โญ๏ธ 2
๐Ÿ•“ 4 years ago
macOS
MihaelIsaev/VaporEDC 1.0.0
Vapor service to communicate with EDC coin API
โญ๏ธ 0
๐Ÿ•“ 4 years ago

Swiftpack is being maintained by Petr Pavlik | @ptrpavlik | @swiftpackco | API | Analytics